Full Release Notes
BACKLOG
|
Apply detail layout on item create form |
Provide ability to set which detail layout to apply on module item create/edit forms
Logic
|
|||||||||||||||||||||||||
|
Secure to CartID and crm member cookies |
Set Secure attribute on the following cookies
|
|||||||||||||||||||||||||
|
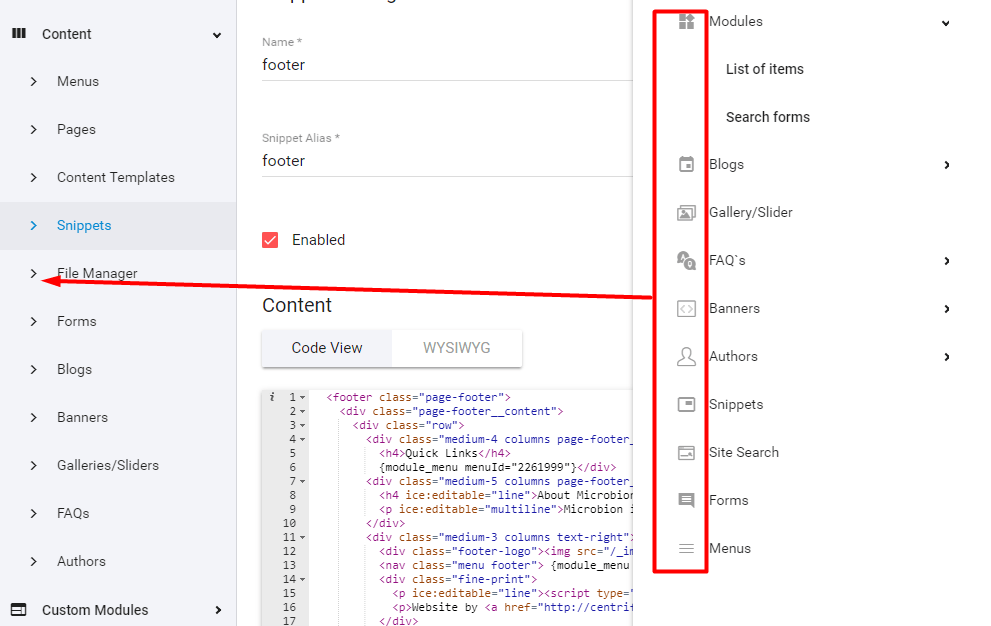
Site Information (Site Globals) Enhancements/Fixes |
https://webinone.com/public-backlog-state/in-process/site-information-enhancements-fixes A few minor adjustment requests for Site Information module: dateTime field is still just a Date field. Is it possible to update this to select Time as well (as per dateTime field update throughout the rest of the admin) When setting an Alias (particularly a ‘Short Alias’) there is a validation that runs to check for conflicting names. However, this seems to look at ALL properties in ALL groups, not just the group you are in, which starts to make it harder to set up short aliases. For example: In a group called ‘Company Info’ with a property of ‘Licence’ you might have Short Alias of {{si.ci.l}} Then in another group called ‘Company Branding’ with a property of ‘Logo’ you might want Short Alias of {{si.cb.l}} . But the validation only checks against the last Liquid reference of l (which conflicts) rather than the whole path (which is unique). The textarea field type is labeled as Text (Multiple), but I think it should be Text (Multiline). Liquid: It would be great to recursively nest site information items. To do so they would need to render liquid, which they currently don’t. For example if I have a site information company name and I want to nest that in a copyright notice so the client can just embed the copyright notice at the end of their blog posts. Please make liquid work inside site information fields. Other: 1. Ability to shuffle items once added. 2. Add a checkbox in the Group level determining whether that group’s properties are added to the Component toolbox or not.
3. HTML Layouts for formatted output. |
|||||||||||||||||||||||||
|
Analytics Dashboard - Google Data Studio (now Looker Studio) Option |
https://webinone.com/public-backlog-state/in-process/analytics-dashboard-google-data-studio-option Added Looker Studio Embeded |
|||||||||||||||||||||||||
|
Create Default JS Validation |
https://webinone.com/public-backlog-state/in-process/create-default-js-validation Default validation for mandatory fields Add the option on the Settings tab "Enable Default JS Validation". If this option is enabled, `data-cms_validation` will be added on the form tag and add a validation js script in the head. If a form element is not valid it will add class "validation-error" on the element and if valid "validation-success" will be added. |
|||||||||||||||||||||||||
|
File Manager: Show Date + List View in "Slide-In" |
https://webinone.com/public-backlog-state/in-process/file-manager-show-date-list-view-in-slide-in The list view in file manager should include the date of the upload like in BC to make it easier to handle e.g. media files, which are updated on a regular basis. The slide-in file manager (when selecting media or other files from within module item) should have an option for list view. It makes it hard to select files with similar long file names in thumbnail view. |
|||||||||||||||||||||||||
|
Custom Reports (further refinement) |
https://webinone.com/public-backlog-state/in-process/custom-reports-further-refinement "Select/Deselect All" option for these areas to expand our custom report filtering results |
|||||||||||||||||||||||||
|
File Upload On Mobile Devices |
https://webinone.com/public-backlog-state/in-process/file-upload-on-mobile-devices The ability to upload files to the file manager from mobile devices. |
|||||||||||||||||||||||||
|
Custom Module: Remove Downloadable Media Checkbox |
When adding a ‘Media’ field type in a Custom Module the “Downloadable file” option is automatically added under the field. I like to see this removed as it would surely not be used all that often and creates confusion and clutter in the interface. Instead, could it be added as an option when setting up the Media property? So we can control whether or not it’s displayed: |
|||||||||||||||||||||||||
|
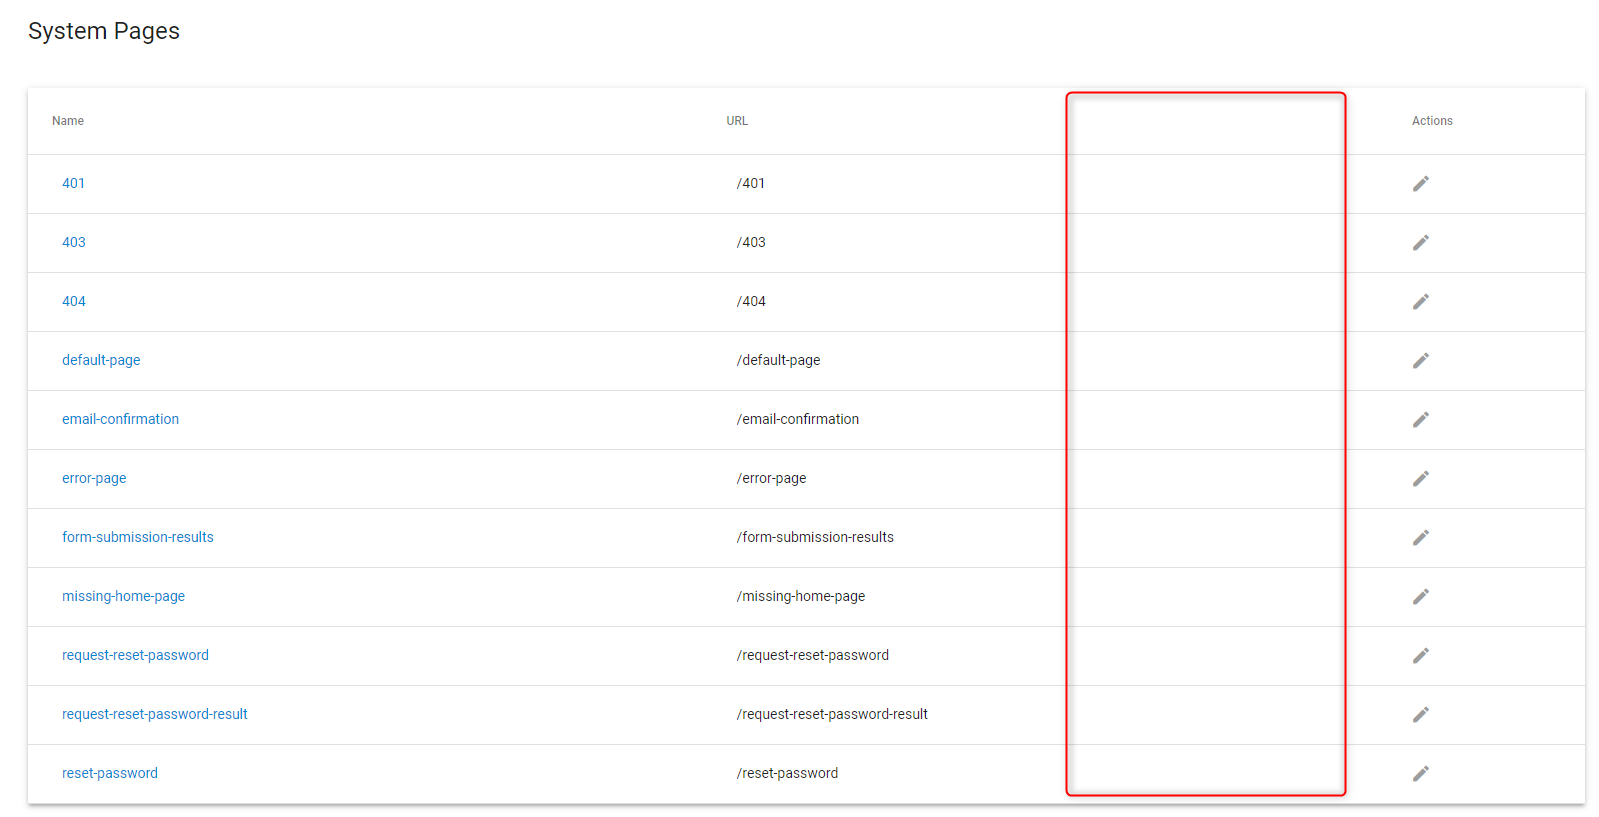
UX/UI Request: List Template Used Against System Pages + enable/disable system pages |
Would be nice to see at a glance the template that is applied to system page. I’d image this would be a simple fix too. System pages can now be disabled via an 'Enable' checkbox. Disabled pages will resolve to the 404 page. If the 404 page is disabled, a blank page will resolve (with a 404 document status) |
|||||||||||||||||||||||||
|
Google Analytics Global Time Selector |
https://webinone.com/public-backlog-state/in-process/google-analytics-global-time-selector The ability to change all time periods at once in the analytics overview |
|||||||||||||||||||||||||
|
UX Improvement - “Global Component Builder” and “Global File Manager” |
1) https://webinone.com/public-backlog-state/in-process/ux-improvement-global-component-builder Anywhere in the admin console I press something like ‘Shift + Control + C’ on Windows (Shift + Command + C on Mac). A modal appears with the same functionality as the component draw you get it various modules. I always find myself needing to build a component in my IDE, but I have to go to the admin console, then to something like pages to be able to pull to create a component. Would be nice if we could just access a builder anywhere in the admin console. 2) Likewise, also add ‘Shift + Control + F’ on Windows (Shift + Command + F on Mac) to open the File Manager anywhere in the admin. |
|||||||||||||||||||||||||
|
Fields/columns Added To The E-commerce/Gift Vouchers Module |
Please add the following fields/columns to the gift voucher module:
|
|||||||||||||||||||||||||
|
Add “Delete All Items” toggle for Admin User Roles |
Case: To stop the ability for Admin Users to be able to accidently delete all module items. Can we get an extra flag added in the Admin User Roles that gets generated for each custom module or anywhere this appears Have it unchecked by default. Else, everyone will forget to configure it until it’s too late. So, essentially, ‘Delete All’ function is for Partner/Reseller admins only, unless configured otherwise. |
|||||||||||||||||||||||||
|
Custom Modules Properties: Making Mandatory Items More Visible |
When you check the custom properties of any custom module and want to know which ones are defined as mandatory, you need to click each one into edit mode. It would be nice if we could see which ones are mandatory right in the properties list. |
|||||||||||||||||||||||||
|
Module Item Notes: Option To Display Notes More Prominently |
Module item notes are great! But they are a bit small and users can miss them. Sometimes I want to add big bold notes that will give users instructions that they can’t miss. Issues: Currently module field notes are displayed in a small icon that needs to be hovered to see them. Clients may miss this subtle icon. Solution: Add a check box that will allow notes for a module field to be displayed inline: |
|||||||||||||||||||||||||
|
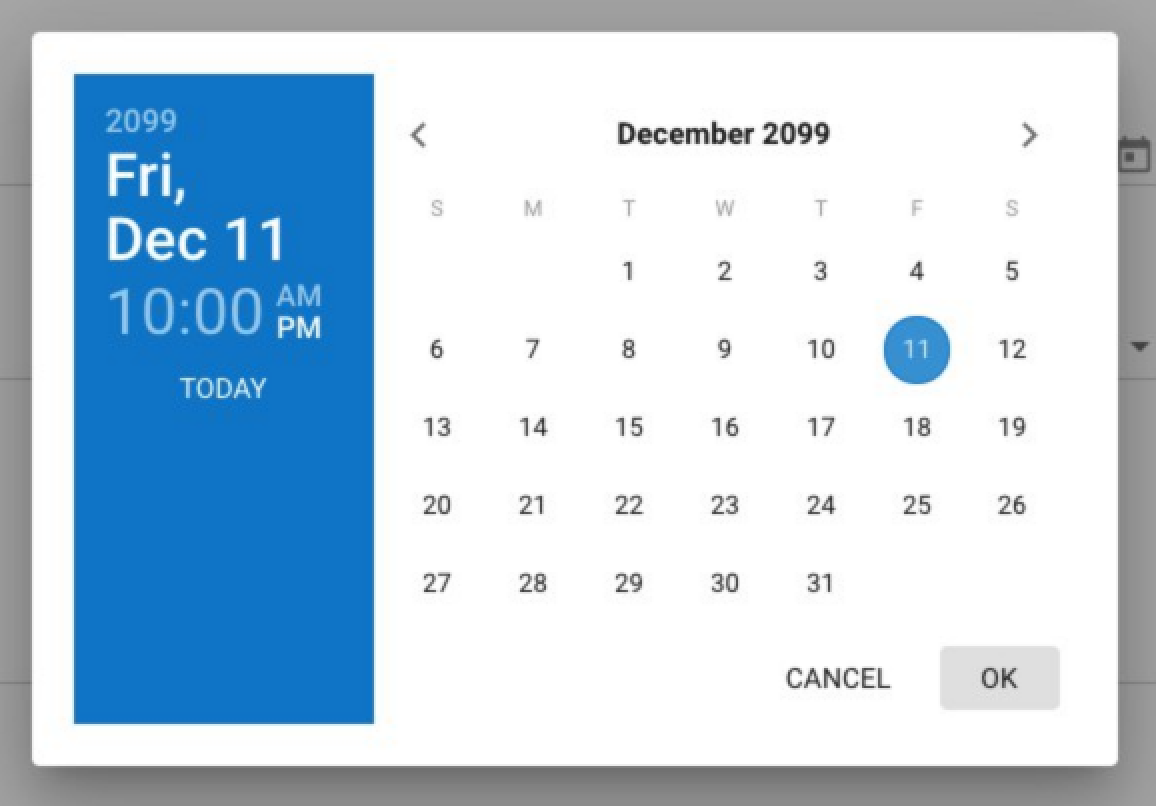
Add Release And Expiry Dates/Time To Menu Items |
https://webinone.com/public-backlog-state/in-process/add-release-and-expiry-dates-time-to-menu-items When sites are being updated, it is common to have a release time for updates. This release time may be at an inconvenient time for the developer. Frequently site updates will mean new sections of the site are being added or removed. To add and remove sections of the website it would be great to have the ability for new sections of the menu to be automatically released, and old sections of the menu to expire and be hidden. I propose adding the ability to enable release and expirty date/times to menu items. Similar to custom modules, we would have the ability to enable release and expiry under settings for the menu. |
|||||||||||||||||||||||||
|
Admin UI/UX Adjustments |
https://webinone.com/public-backlog-state/in-process/admin-ui-ux-adjustments 1) Add the item preview icon at the top of item edit pages so it’s readily accessible (the current Preview link is often out of reach when you want it). 2) Add a new sticky box with the Components and File Manager buttons on the create/edit module item page and also to places where it’s not currently available, such as; ‘System Pages’, ‘System Emails’ and anywhere an editor region is present like; Form layouts, email/autoresponder/workflow contents. 3) This new sticky box will also include the ‘Properties’ icon along with the ‘File Manager’ and ‘Component Manager’ icons in the editor pages for module Layouts. |
|||||||||||||||||||||||||
|
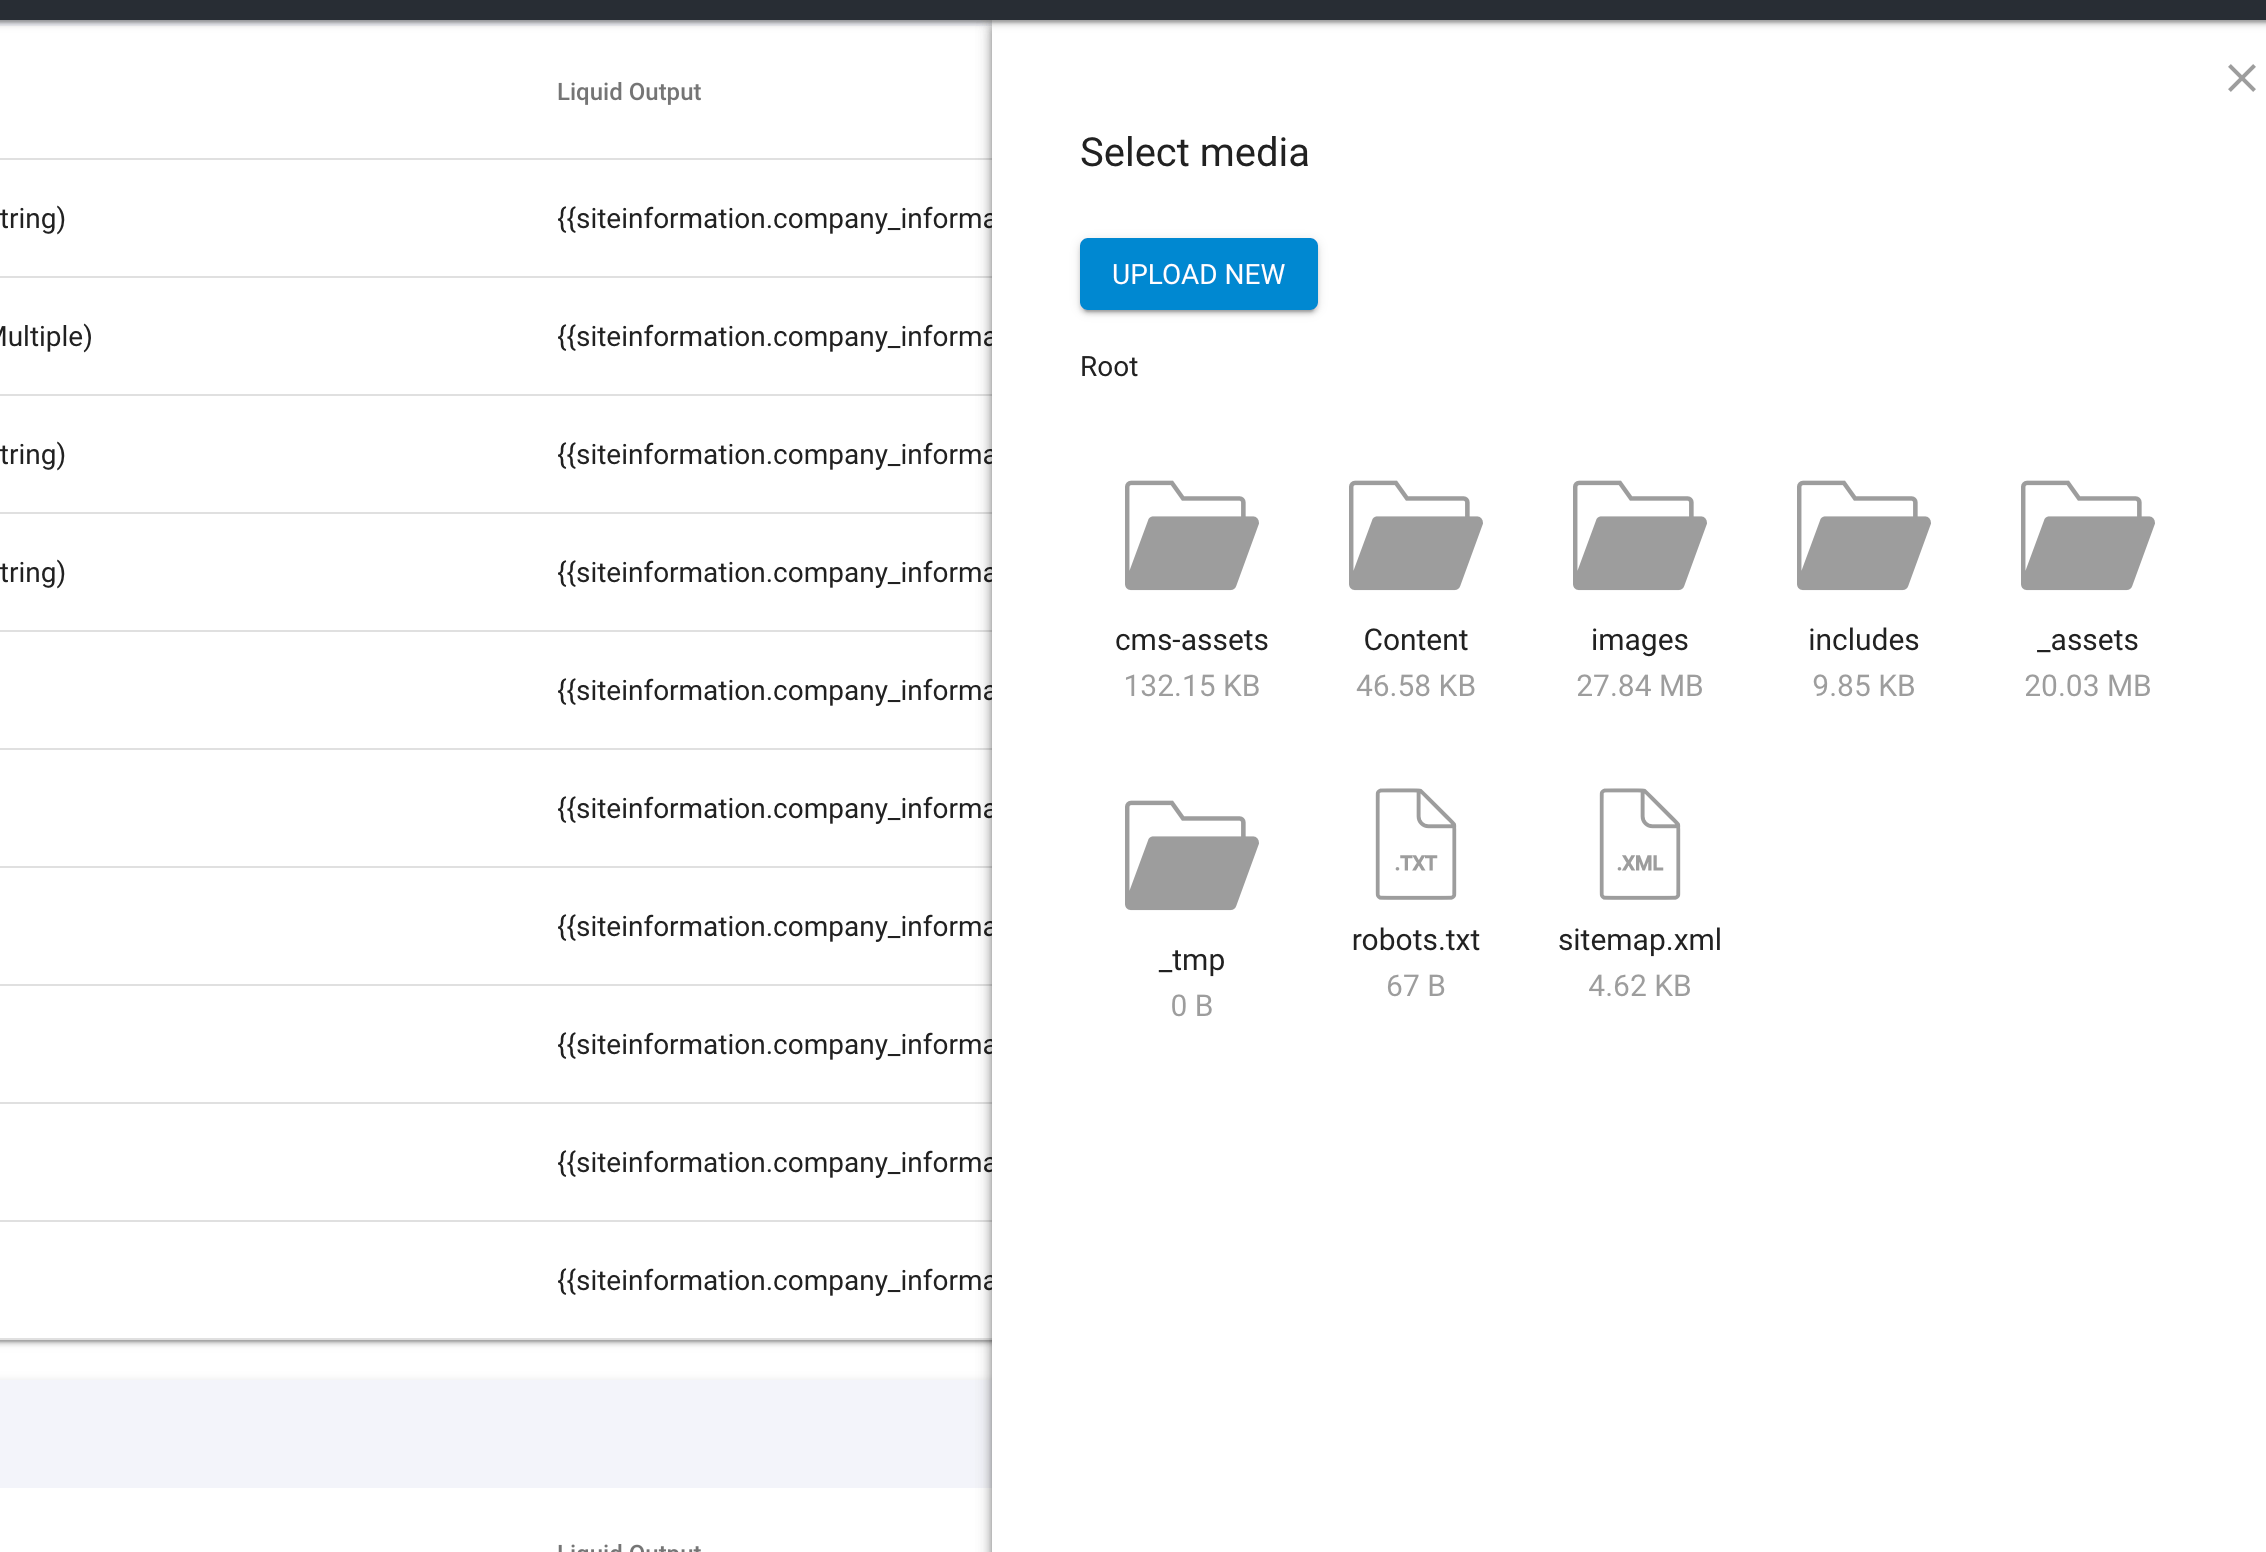
Create Folder Within Image/Media Manager |
https://webinone.com/public-backlog-state/in-process/create-folder-within-image-media-manager The ability to add a folder within Media/Image Manager |
|||||||||||||||||||||||||
|
Custom Module: Custom Properties. Rename "Text (String)" To "Single Line Text" Or "String (Text)". |
When creating lots of fields it's time consuming to click on the dropdown and scroll to the correct property. It would be nice if you could just push "s" to jump to string. Ideally every type of field would have a name with a unique starting letter so you could use keys to jump to them. Also recommend having string as the default field type when creating a field. |
|||||||||||||||||||||||||
|
1 hour refresh issue fix |
Fix losing updated data on saving operations when the actual token is expired. 1) Presave to session storage flow
|
|||||||||||||||||||||||||
|
Feature flags changes (v6.10) |
Apply the following changes to feature flags:
This feature flag switches the logic of saving module items, pages, etc. New logic will take less time to load any page after saving if you have many module items. The opposite part of this logic is the increasing time of any import module item process for sites that have many module items. It is applicable to the sites with a lot of module items created. |
|||||||||||||||||||||||||
|
Internet connection checker (UI) |
Add internet connection monitoring in the admin panel. If internet connection is lost - show message: "No Internet Connection" |
|||||||||||||||||||||||||
|
Liquid Date Formatting Issue fix |
Liquid Date Formatting Issue An issue with the Liquid date formatting filter (`| date`) has been identified. Below is a description of the issue, possible conflicts with existing implementations, and our proposed fix. ISSUE: When using the date filter syntax of `%I` for outputting the hour in 12-hour time with a leading zero (eg: `{{ "now" | date: "%I" }}`) the output will be incorrect for the hour of 12 (am or pm), in that it will output `00` instead of `12`. This is purely a formatting issue for this particular filter syntax and does not affect Liquid date calculations. CONFLICTS: We don't anticipate this fix will negatively impact any current implementations of this feature - on the contrary, any date-related Liquid implementations using the 12-hour filter output would currently be breaking under the conditions described in this issue and therefore, the fix will correct those implementations. In the rare case that you have an implementation relying on the hour of 12, in 12-hour time, with leading zero output, being "00" (which is incorrect), you will need to adjust your code to allow for this correction. PROPOSED FIX: As there is a small chance of this change affecting existing implementations and due to the issue's low criticality, we will add the feature flag "Apply fix to liquid date filter". The fix itself will then be rolled out as a hotfix to all sites during their data center non-business hours. No downtime is expected for the admin or site front-ends during this hotfix and a notification will be posted once it has been fully completed across all data centers. FEEDBACK: If you have any questions, feedback, or concerns regarding this fix, please reach out to support via a support ticket before the proposed fix date is reached. NOTES: The similar `| format_date` Liquid filter does not suffer from the described issue and is therefore unaffected by this fix and continues working normally. |
|||||||||||||||||||||||||
|
Improve workflow sending logic based on plan restrictions |
1) Fix the ability to send custom workflows if the site plan is lower than Pro. When the site plan is Business or Essential (lower then Pro):
2) Improve displaying of the workflows with forbidden emails applied on workflow listing Show label for workflows with custom email applied Pattern
Label
Color
Example
3) Show inactive email field on workflows on plans lower than pro
|
|||||||||||||||||||||||||
|
Empty tables UI improvements - Admin |
Empty tables logic/UI Show message "Nothing here yet" instead of empty table if no searching-filtering is applied Show empty table if any search or filtering is applied to the list view |
|||||||||||||||||||||||||
|
Case sensitivity FTP improvement |
1) Pages and folders case change on migration Description: On migration we would collect all url slugs of "Page" and "Folders" module items that has at least one uppercase letter and convert them to lowercase. Then we will rename the files and folders for the following items accordingly in the "/Content/Pages" folder 2) Liquid incorrect paths change on migration Places to be operated:
Liquid tags to be fixed (example regexp: https://dotnetfiddle.net/t8939t ):
Description: On migration we would scan page content, templates, snippets, module layouts, etc for using liquid include and component with custom layout path tags and replace paths to match case-sensitive actual path (for example if we found {% include "/Content/Pages/testfolder/TestIncludeFile.inc" %} we will fix it to match actual path - /Content/Pages/TestFolder/TestIncludeFile.inc and it will become {% include "/Content/Pages/TestFolder/TestIncludeFile.inc" %}) 3) JS, CSS, and image URLs change on migration Places to be operated:
HTML tags to be worked with (example regexp: https://dotnetfiddle.net/t8939t ):
Description: Same as in previous but working with html tags insted of liquid 4) Improve the logic of operation files and folders in the "/Content/Pages" folder Description: Any files that would be created in the "/Content/Pages" folder should be lowercase from now on. If they would be created not fully lowercased - they would be ignored. So if you create a file Test.html in the folder /Content/Pages/ - it WOULD NOT create a page with slug Test. But if you create a file test.html in the folder /Content/Pages/ - it WOULD create a page with slug test. Also renaming test.html to Test.html would unlink the Test.html file from the "/test" page. If you save the "/test" page from the admin UI it will create a test.html file and it will be linked with the page (the main rule is that the page slug is fully equal to the file name (case sensitive)). Any operations with the Test.html would not be reflected in any way on the pages at all. However, if you rename it back to the test.html - it will be linked back to the page "/test" but without content sync (it means that if you rename test.html to Test.html, change content in Test.html and rename it back to test.html - the content of the page "/test" would not be the same as in the test.html file. The first save of the file or page would determine - what content would be saved to opposite entity in that case - if the save file - page content would be updated. If the save page - the file content would be updated). 5) System and custom email file name fix Description: On migration we would change all file names that reflect all system and custom (workflow, followup, abandoned cart) emails so it is the same as the email Name (right now if you have a workflow email with the name "My Custom Email" - it has a file on FTP with the name "my-custom-email.html". This step will rename the file to become "My Custom Email.html"). NOTE: So if you already have the backup version of the site you are working with then just make a fresh copy right after your site would be updated to the v6.10 More documentation on this change can be found here. |
|||||||||||||||||||||||||
|
Angular 15 refactoring |
|
|||||||||||||||||||||||||
|
Event calendar month by URL accessibility |
Add month-year accessibility via URL to the event calendar URL parameters names:
If page requested via URL like
Calendar should open the appropriate year and month view |
|||||||||||||||||||||||||
|
File Manager - move file |
Ability to move files in file manager via context menu and drag and drop. DESIGN: |
|||||||||||||||||||||||||
|
File Manager - move folder |
Ability to move folders in file manager via context menu and drag and drop. DESIGN: |
|||||||||||||||||||||||||
|
Pagination refactoring |
Rework all paginations on all admin UI layouts to work through server side. This would allow optimizing a list load speed on all layouts that previously used client-side pagination.
Added pagination to the following list layouts:
|
|||||||||||||||||||||||||
|
System emails a-z sorting by name |
All system emails now sorted alphabetically |
|||||||||||||||||||||||||
|
"New Item" button name standardization |
"New Item" button text was changed from ADD to CREATE throughout the admin. |
|||||||||||||||||||||||||
|
Case insensitive search in admin UI |
Search in admin UI now works in case insensitive manner |
|||||||||||||||||||||||||
|
Email data widget improvement |
Now Email data widget would show only data that corresponds to current type of email (workflow email, follow-up email or abandoned cart notification email) |
BUGFIX
|
Custom module - filter by Author |
SLACK: Go to Components -> Choose custom module with Author -> Filter by Author -> ONLY In code should be display ID, not name https://prnt.sc/fShwUL0TmW8a Should be |
|
Secured Content - twice click on one page |
Go to some Secure Zone -> Secure Content -> click on several page and use ctr/command and click twice on one page -> after that move pages from left window in right window - not all pages moved https://drive.google.com/file/d/17O5OyXaUY9yQTp-k1BBBi-mQ293lYaoa/view?usp=sharing https://treepl.slack.com/archives/C023SU50YQP/p1656082426131989 |
|
Categories - Missing parent Category names |
BUG: Missing parent Category names https://the-second-site-owner.trialsite.co/admin/module/1827/item/2053/settings?view=list-view&pageIndex=0&moduleId=1827&parentId=1827 SLACK: |
|
custom module - delete item with custom redirect |
SLACK:
|
|
Custom module - broken list |
|
|
Products - InStock value doesn't show in frontend after import |
|
|
Custom module - import with invalid parent URL |
|
|
Custom reports - results don't show the CMR group values |
|
|
System email - Restore Admin User Password |
When resetting the user admin password, the {{this.User}} model from which the “FIrst Name” is taken in the letter is not available https://prnt.sc/L0ELMfsrWu21 https://prnt.sc/iLDD43t9vqu7 |
|
Using Cases component you can not filter "equally" by form name |
|
|
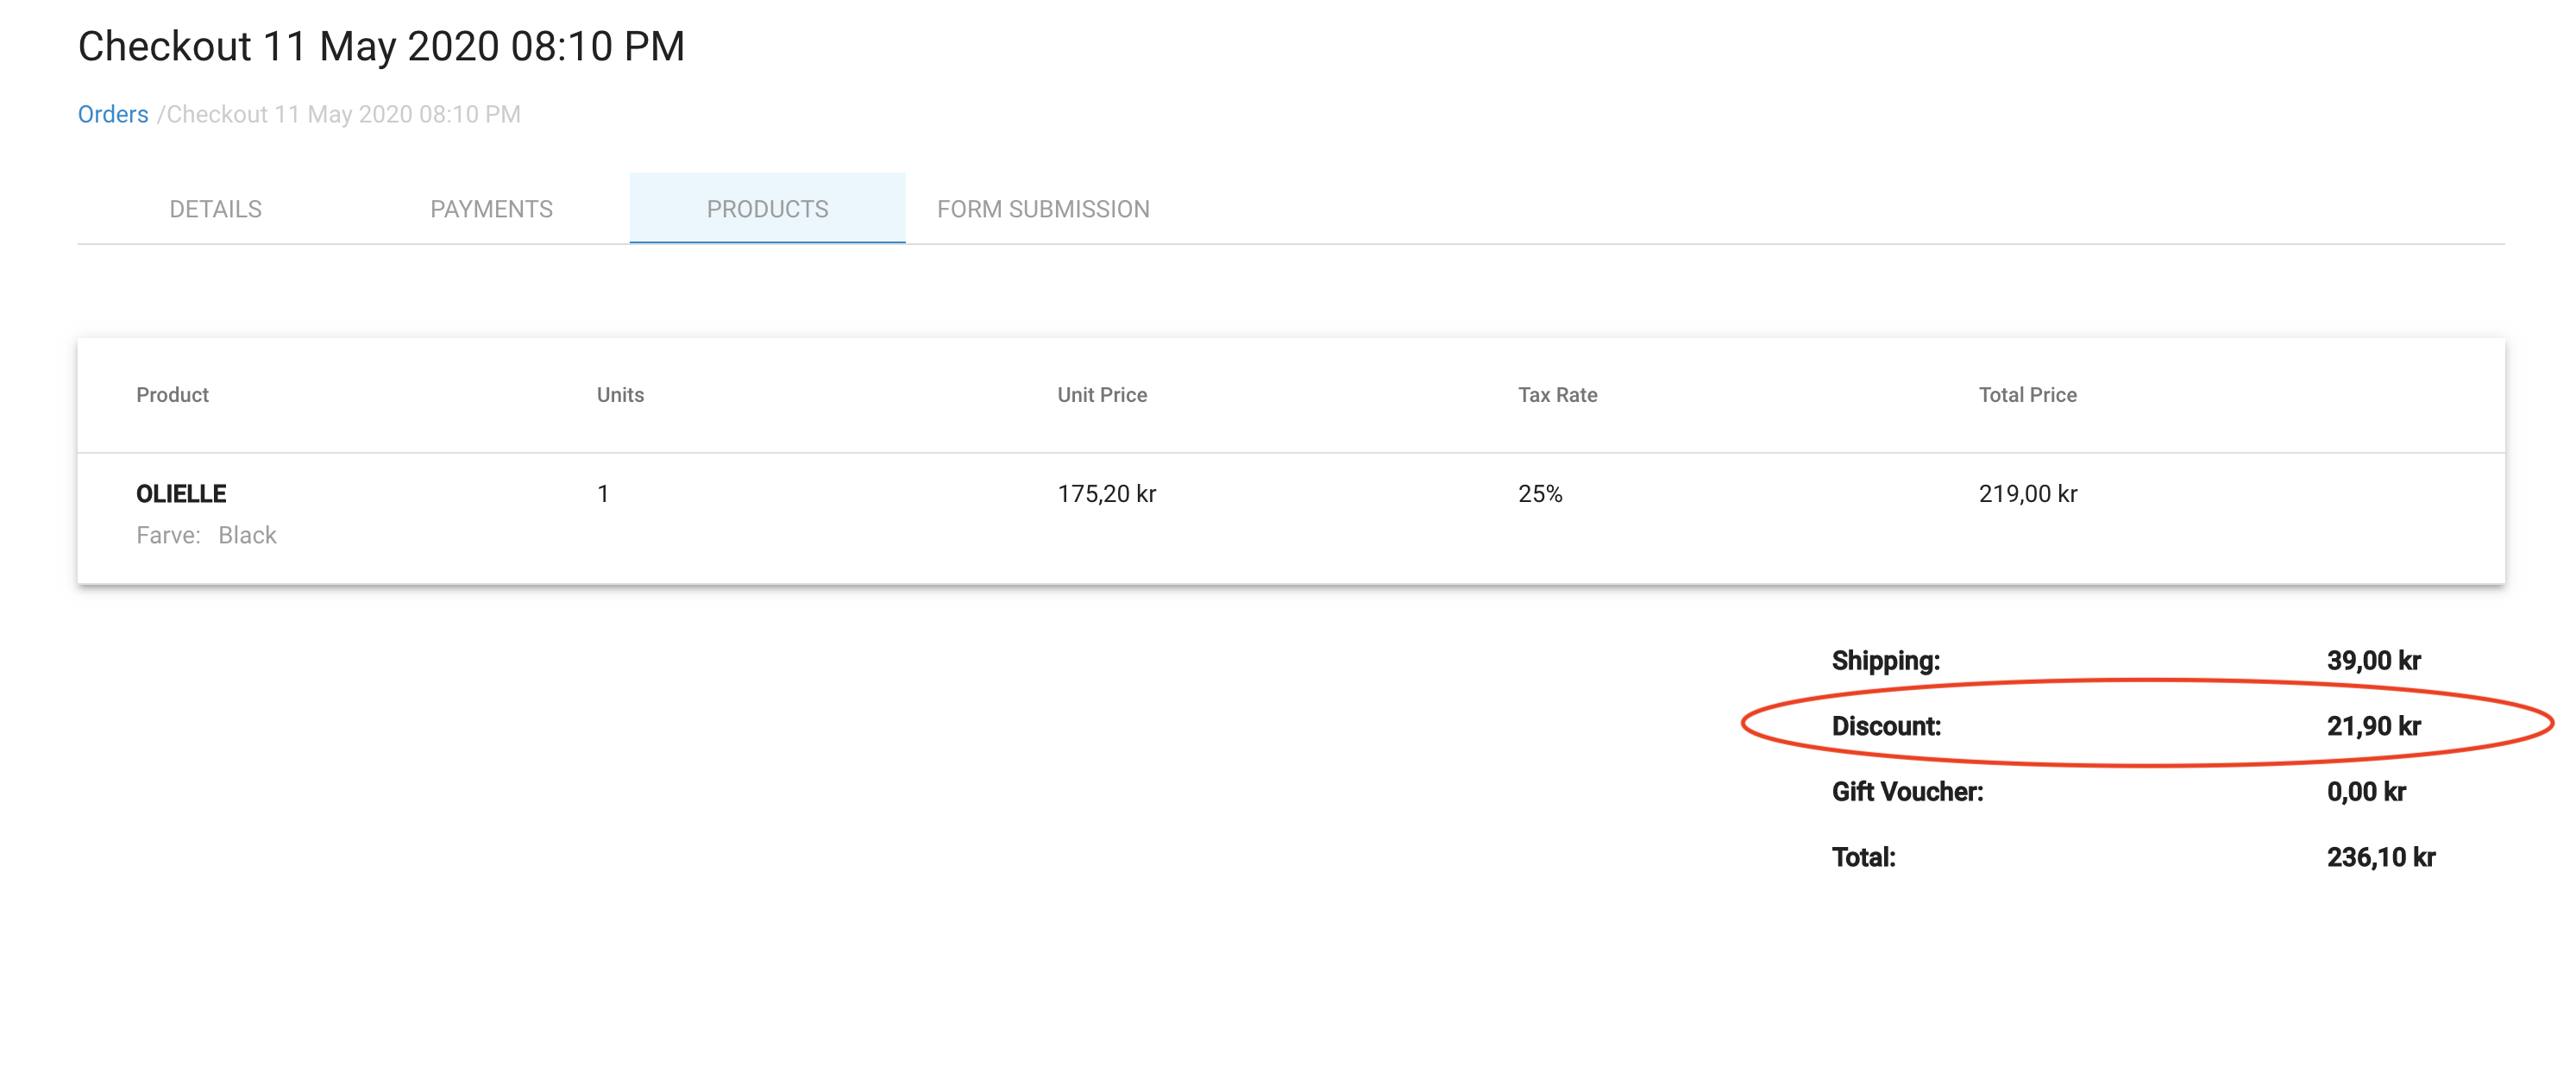
Orders - discount prices |
|
Internal infrastructure overhaul
-
Internal infrastructure overhaul which presumes servers, storage, FTP upgrade and source code transition from .NET 5 to .NET 6.
Overall CMS performance and secuirty enhancements are expected with this release.
Analytics Dashboard - Google Data Studio Option
-
DESCRIPTION:
Ability to replace the current analytics dashboard with a client’s own Google Data Studio embed. Allowing vastly customisable analytics and other reporting views directly in the Treepl website admin.What is Google Data Studio:
Transform your raw data into the metrics and dimensions needed to create easy-to-follow reports and dashboards. You can create meaningful, shareable charts and graphs with...
- Admin Panel
- Analytics
Google Analytics Global Time Selector
- The ability to change all time periods at once in the analytics overview
- Analytics
- WebinOne Portal
UX Improvement - “Global Component Builder”
-
Anywhere in the admin console I press something like Shift + alt + c .
A modal appears with the same functionality as the component draw you get it various modules.
Why???
I always find myself needing to build a component in my IDE, but I have to go to the admin console, then to something like...
- Admin Panel
- UI/UX
Add “Delete All Items” toggle for Admin User Roles
-
Case: To stop the ability for Admin Users to be able to accidently delete all module items.
Can we get an extra flag added in the Admin User Roles that gets generated for each custom module or anywhere this appears
Have it unchecked by default. Else, everyone will forget to configure it until it’s too late. So, essentially, ‘Delete...
- Admin Panel
- UI/UX
Add Release And Expiry Dates/Time To Menu Items
- When sites are being updated, it is common to have a release time for updates. This release time may be at an inconvenient time for the developer. Frequently site updates will mean new sections of the site are being added or removed. To add and remove sections of the website it would be great to have the ability for new...
- Admin Panel
- Menus
Admin UI/UX Adjustments
-
For most modules when adding an item there is a “Save” or “Save and New” button. I would like the “Save and New” button to be there even when editing an item not just when creating a new item.
In regards to the “Save” or “Save and New” buttons I’ve been wondering if it might also be...
- UI/UX
Create Folder Within Image/Media Manager
-
The ability to add a folder within Media/Image Manager
- File Manager
Custom Module: Custom Properties. Rename "Text (String)" To "Single Line Text" Or "String (Text)".
- When creating lots of fields it's time consuming to click on the dropdown and scroll to the correct property. It would be nice if you could just push "s" to jump to string. Ideally every type of field would have a name with a unique starting letter so you could use keys to jump to them. Also recommend having string...
- Custom Modules
Custom Module: Remove Downloadable Media Checkbox
-
When adding a ‘Media’ field type in a Custom Module the “Downloadable file” option is automatically added under the field.
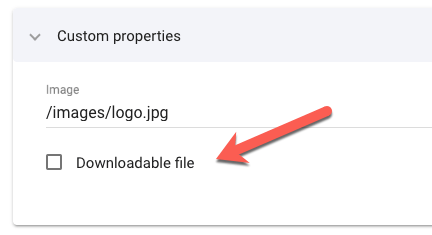
I like to see this removed as it would surely not be used all that often and creates confusion and clutter in the interface.
Instead, could it be added as an option when...
- Custom Modules
Custom Modules Properties: Making Mandatory Items More Visible
-
When you check the custom properties of any custom module and want to know which ones are defined as mandatory, you need to click each one into edit mode:
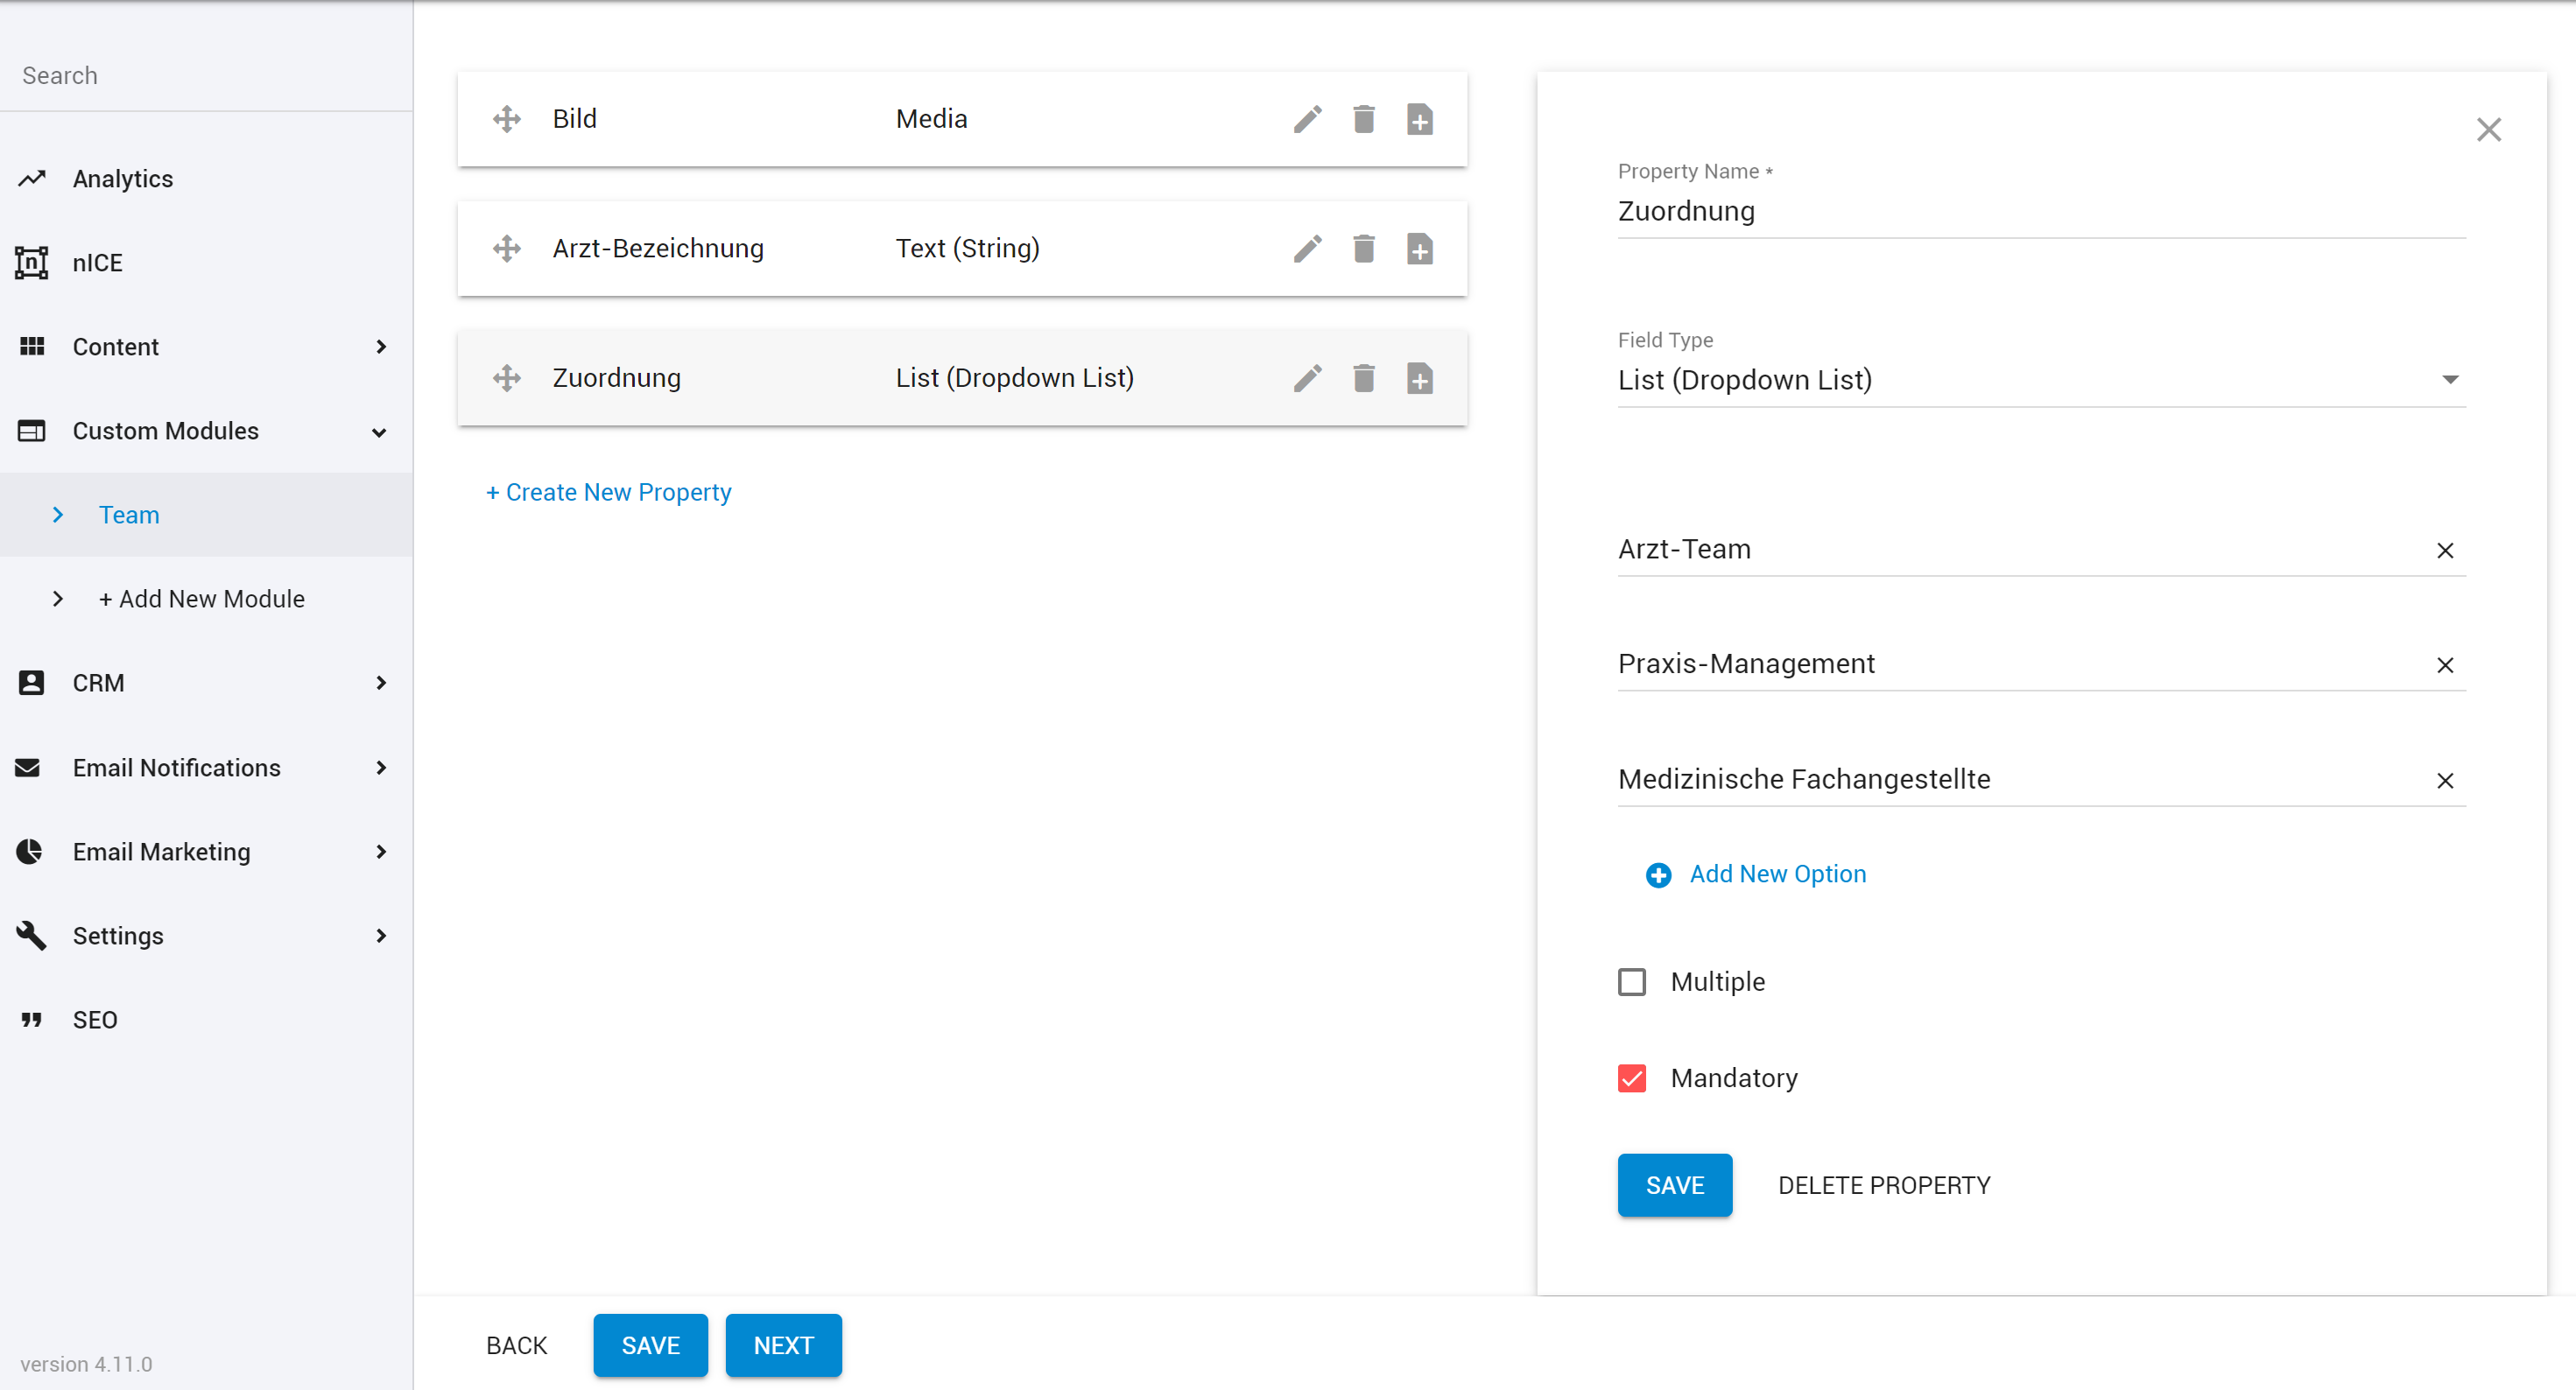
It would be nice if we could see which ones are mandatory right in the properties list.
- Custom Modules
Custom Reports (further refinement)
-
Select/Deselect All option for these areas to expand our custom report filtering results

- UI/UX
Fields/columns Added To The E-commerce/Gift Vouchers Module
-
Please add the following fields/columns to the gift voucher module:
- Date Purchased
- Purchasers Name
- Order Number
- Link to order on list view
- Ecommerce
File Manager: Show Date + List View in "Slide-In"
-
The list view in file manager should include the date of the upload like in BC to make it easier to handle e.g. media files, which are updated on a regular basis.
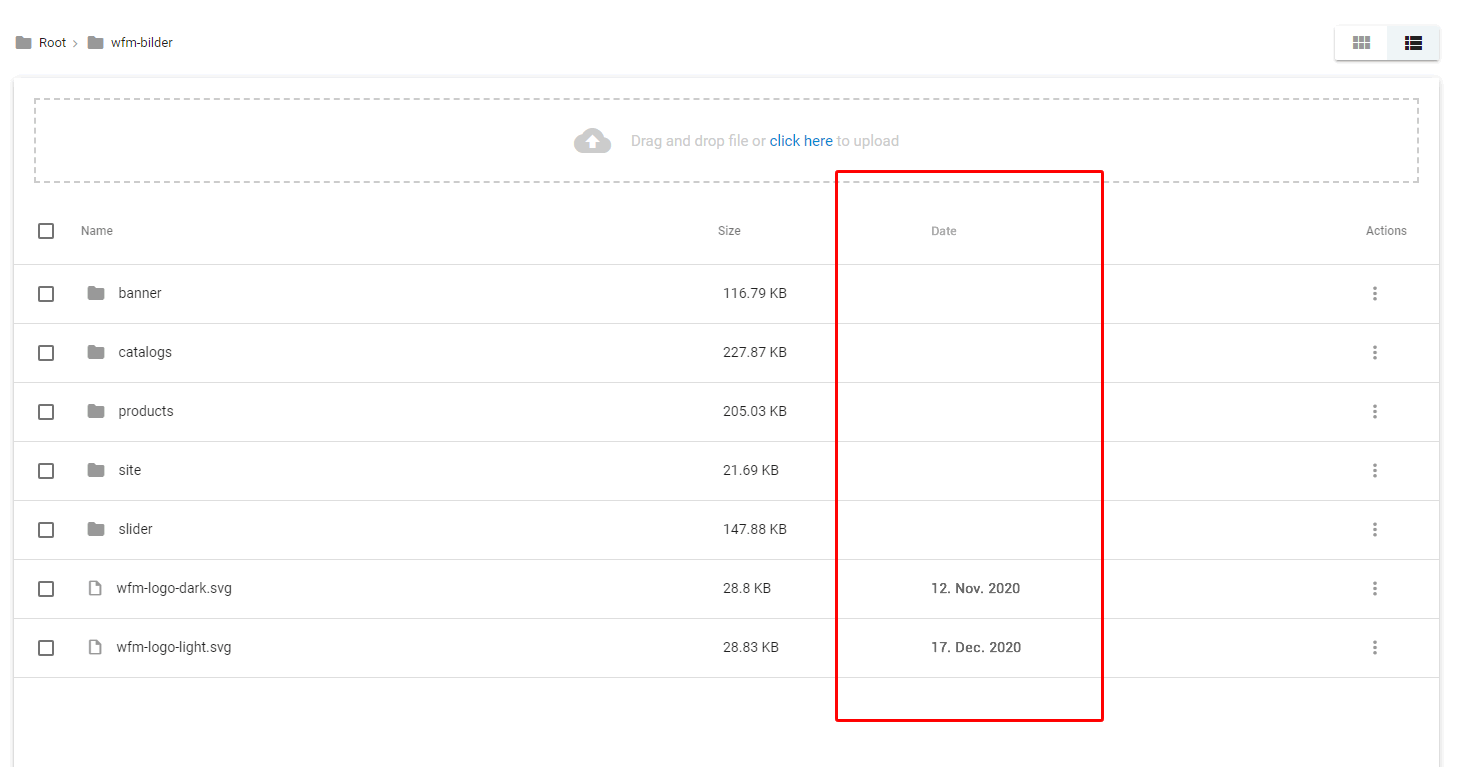
The slide-in file manager (when selecting media or other files from within module item) should have an option for list view. It makes...
- File Manager
File Manager to better display images with transparent backgrounds
-
DESCRIPTION:
Enhancement for the File Manager (and Media fields) to better cater for, and display, transparency in image files (such as PNGs and SVGs) so that the thumbnails of transparent images with white areas don’t become invisible.DETAIL:
I’ve often come across the issue of not being able to properly see some images files in the File Manager when they...
- File Manager
File Upload On Mobile Devices
-
The ability to upload files to the file manager from mobile devices.
- Admin Panel
- File Manager
- UI/UX
Module Item Notes: Option To Display Notes More Prominently
-
Module item notes are great!
But they are a bit small and users can miss them. Sometimes I want to add big bold notes that will give users instructions that they can’t miss.
Issues: Currently module field notes are displayed in a small icon that needs to be hovered to see them. Clients may miss this subtle icon.
...
- Admin Panel
- Custom Modules
Site Information Enhancements/Fixes
-
A few minor adjustment requests for Site Information module:
dateTime field is still just a Date field. Is it possible to update this to select Time as well (as per dateTime field update throughout the rest of the admin)
When setting an Alias (particularly a ‘Short Alias’) there is a validation that runs to check for conflicting names....
- Admin Panel
UX/UI Request: List Template Used Against System Pages
-
Would be nice to see at a glance the template that is applied to system page.
I’d image this would be a simple fix too.
- Pages and Templates
- UI/UX
Full Release Notes
|
Portal |
Rename Site |
Ability to rename site name in Treepl Portal (under site settings) |
|
Portal |
Export site details |
Export data for Trial and Live sites For Live sites: File Name: “Live_Sites_Export_${dateStr}.xlsx” Export Data:
Export Data:
DESIGN (for button placement): https://invis.io/KS111912R74U Restrictions:
|
|
Portal |
Renewal notifications |
Renewal checker will ping sites for renewal info. If site found that matches condition - send email notification. Conditions: If current date is:
Email sending conditions:
Email notifications: Create emails templates for monthly and annual subscription DESIGN: https://invis.io/H6111B3M9PYQ |
|
BACKLOG |
New Architecture |
Database and CMS Core New Architecture as presented on Treehouse #22: https://forum.treepl.co/t/treehouse-meeting-22/1658/4 LIQUID 3.0 New liquid engine provides much faster data retrieval than the previous version. However there are also some differences in liquid work between versions. Mostly they are the fixes of previous functionality that was semi-broken but still could be used by some partners as it was. In that case such use of the buggy implementation required it to be fixed. See this documentation article for changes and required actions. |
|
BACKLOG |
File Manager - Editing in tabs |
Provide ability to open several files in tabs in the file manager DESIGN: https://invis.io/ZA10840NYPRV Editing supported for text-based files only of the following extension types:
|
|
BACKLOG |
Show Discount Codes In Backend |
The ability to see which discount code is used for a specific order in the backend. Order details: Order Products list: |
|
BACKLOG |
Allow module item search from Tree View (same as List View) |
The ability to search in nested module items and in Tree View (like you can in List View) for Pages, Snippets, Custom Modules, etc. |
|
BACKLOG |
Pagination on tree view module items |
1) Add pagination for tree view in admin panel (UI is the same as for list view). Pagination is now applied to both ’Parent’ items (viewed as folder icons) and ’Child’ items (viewed as file icons) and acts upon the whole list. 2) Apply Sorting via backend. Default sorting is not set (sort "folders" (parent module items) first then "files" (child module items)). Remember latest applied sorting (like it's done for list view). Store sorting field/sort direction separately from list view so they are remembered independently. 3) Add searching by name for the current level |
|
BACKLOG |
Show/Hide Inactive/Disabled Items |
The ability to show/hide inactive/disabled items across all modules.
DESIGN: https://invis.io/8B10ETTMSHCU |
|
BACKLOG |
Module Introductory Note |
Allow adding an introductory paragraph to the module list view to give editors some guidance.
DESIGN: https://invis.io/6U10E76B32XQ |
|
BACKLOG |
Bulk Assign Templates |
Ability to assign several items (Pages, System Module items, Custom Module items) to a template via admin interface. DESIGN: https://projects.invisionapp.com/share/PQ10EEP7NKZA#/screens/446376158 |
|
BACKLOG |
Implement reCaptcha v3 For System Forms/login |
Add ability to select the version of reCaptcha used for system forms Add section to ‘Settings’ > ‘Misc’ with the ability to choose reCaptcha v2 or reCaptcha v3 to use on all system forms, which include:
Selected reCaptcha will affect both, the way the form's html is generated from the toolbox/component manager, and the reCaptcha validation for the submit action. |
|
BACKLOG |
Add “Format” To Code Editor |
Add Button for code formatting purposes. DESIGN: https://invis.io/NT10EEPX3GSY |
|
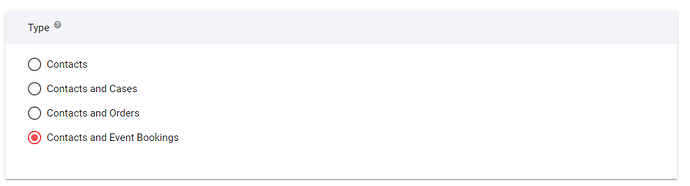
BACKLOG |
Customer Bookings and orders tabs |
Add Event Bookings tab to CRM Contact: Content should be the same table as on Event Bookings page http://prntscr.com/15hktfh Add Orders tab to CRM Contact: Content should be the same table as on Orders page http://prntscr.com/15hkv9f |
Bulk Assignment Of Pages To A Template
-
Ability to assign several pages to a template via admin interface.
- Pages and Templates
- UI/UX
Allow module child item search from Tree View (same as List View)
-
The ability to search in Blog posts just like in pages, snippets, Custom Modules etc.
- Blogs
- UI/UX
Implement reCaptcha v3 For System Forms/login
-
DESCRIPTION:
Depreciate the need to use recaptcha v2 on login forms and any other system form (I can only think of the account password update form, but there may be others).BENEFIT:
Logins are always a barrier for end-users and bring along a whole set of additional user issues.
Implementing recaptcha v3 just helps make this process more user-friendly and...
- General
- Member Area
Module Introductory Note: allow adding an introductory paragraph to the module list view
-
Allow adding an introductory paragraph to the module list view to give editors some guidance
Sometimes we want to give users some general directions for a module or some context on how a module is being used and what part of the website it populates.
Proposed solution:
Allow the addition of notes to a module that would be...
- Admin Panel
- Custom Modules
New Architecture
- This is the biggest update to Treepl CMS ever. We will be organizing a separate meeting to present all the changes and opportunities that the new architecture brings to the platform. Stay tuned.
- General
- Infrastructure
- Liquid
Show Discount Codes In Backend
-
The ability to see which discount code is used for a specific order in the backend.
- Ecommerce
Show/Hide Inactive/Disabled Items
-
The ability to show/hide inactive/disabled items across the modules of the admin panel.
· showing all enabled and disabled
· showing just enabled
· showing just disabled
- Admin Panel
- Custom Modules
Full Release Notes
v5.9.1
|
BACKLOG |
Favorites |
1) Add/remove from favorites actions Add two GET URLS (public api), one for “add” and one for “remove”, for logged in users with `itemId` as parameter (id of module item that should be added to favorites) 2) Add component type:"favorites": {% component type:"favorites", source:"[[moduleIdentifier]]", itemId:"[[itemId]]", includeItemData:"[[includeItemData]]", limit:"[[limit]]", collectionVariable:"", layout:"" %}
Default sorting by `CreatedDateTime` DESC. Single item context is:
(If `includeItemData` == true, the modules typical data will be included along with the above “Favorites” data. 3) Add component to toolbox, under: “CRM” > “Favorites” 4) Add default JS and styles for favorites: Once added to favorites - change favorite icon appearance and switch URL from ’add to favorites’ to ’remove from favorites’. Once removed from favorites - change favorite icon appearance and switch URL from ’remove from favorites’ to ’add to favorites’. If user is not logged in and clicks Add or Remove from favorites - redirect them to system error page with the following data:
Apply ability to request add and remove from favorites API urls with GET param `jsonResponse=true`. If `true` - return JSON response with error details (status code 401). Otherwise - redirect to error page with the above described type and message. DESIGN: https://invis.io/VEZ0HS6A8YF |
|
BACKLOG |
eWAY and Stripe improvements |
1) Add to data passed to eWay:
2) Change ”Invoice Description” to <form name> 3) Add data passed to Stripe (only for one-time payment):
4) Change ”Description” to <form name> |
|
BACKLOG |
Show Product URL based on current catalog |
On product detail show URL based on catalog that it’s contained in. Modify component type module logic: If filtered by `parentId` add `this.url` value based on the parent determined by `parentId`, eg:
|
v5.9.2
|
BACKLOG |
Customize Analytics |
1) Analytics Customization
2) Single Chart customization
3) Add Chart to analytics
4) Restrictions Feature available on PRO Plan and higher. |
|
BACKLOG |
Copy File URL to clipboard |
Add ability to get file’s URL in file manager and file manager toolbox.
DESIGN: https://invis.io/VTYEHO7Z6NJ |
|
BACKLOG |
Wording change on event bookings |
Rename following wording in the CMS:
|
|
BACKLOG |
Drop shipping feature improvement |
Feedback description: When a visitor makes an order for several different items on one and the same order the system will create one purchase-order for each item even if they all are supplied by one and the same supplier. This obviously causes a lot of extra work for the suppliers. BC consolidated several items to one and the same purchase-order and only split the order if there were multiple suppliers to supply the items on the order. Solution: Consolidate several items to one supplier email for the same order instead of sending supplier email for each product. |
Bonus: Add Ability To Get File’s URL In File Manager
-
Problem:
It’s hard for users to get file URLs from the file manager.
Proposed solution:
Add a new menu item, “Copy URL”, under file actions dropdown that allows a user to copy the file’s url.
Here:
It would also be nice if the file name was linked to the file location in list (non-tree)...
- File Manager
Customize Analytics
-
Ability to edit admin's "Analytics" page:.
- Rename page and blocks
- Rearrange and resize blocks
- Change or hide data inside blocks
- Set data range
- Add extra analytics
Available starting "Pro" plan.
- Analytics
Full Release Notes
|
Bambora Payment Gateway |
Bambora Improvements (patch v5.8.1) |
Design: http://prntscr.com/vljvo7 1) Implement Payment window modes (payment gateway settings page):
Bambora Documentation: https://developer.bambora.com/europe/... 2) Implement "immediateredirecttoaccept" setting: When the payment has gone through you end up on a "success" page on the bambora site and you can then click to go back to the Treepl site with the receipt.
https://developer.bambora.com/europe/... 3) Language control settings Provide possibility to select the language for the payment window. Bambora Documentation: https://developer.bambora.com/europe/... 4) Add transaction ID to the list view of the order (and allow search). |
|
Misc |
Admin UI: Orders pagination (patch v5.8.1) |
Improve Pagination speed (CRM -> Orders) |
|
Direct Billing |
Invoices for portal payments (patch v5.8.2) |
For direct billing with commissions:
|
|
Feedback Task |
Set 404, 403 and 401 status codes when showing appropriate system pages |
Implement server responses for 404, 403 and 401 statuses to set appropriate status codes and at the same time still display appropriate System Pages content. |
|
Feedback Task |
Admin Proof Read/Suggestions (Part 2) |
Original Source: https://docs.google.com/document/... 12. [ ✔] In the “Form Builder” options, perhaps adjust the form ‘Type’ display names an provide a short explainer, eg |
|
Public Request |
Custom Client Notes For Custom Fields |
Source: Description: New 'Notes' field against any custom field created in the admin. It would display next to the field when clients are creating Custom Module items and could provide additional info to help them when entering content. For example: with an image field, the note might read "This image is displayed as the thumbnail on your Team Members page and ideally should be portrait orientation and at least 500px wide". The note could perhaps be hidden under a help/info icon to keep the layout clean.
Allow add notes (https://projects.invisionapp.com/...) On module item add/edit form: Display notes when hover tooltip icons (https://projects.invisionapp.com/...) Note: Add notes to `module` export/import flow. |
|
Public Request |
Set Custom Icons For Nested Module Items In Tree View |
Source: Source Description: Provide ability to change icon of the item in tree view (http://prntscr.com/vu9h50)
|
|
Feedback Task |
Improve GDPR control, Contacts and advanced CRM groups |
1) Add new Group to `Settings` -> `Misc`
2) Logic If ”Allow listing crm contacts data” == true - discard "Allow listing my contact data in the CMS" checkbox behavior and always allow use all contact data:
3) Components logic extending Add includeSecureZonesInfo: "true" param to {% component type: "CRMContacts" %} If not set - default value is false Also add it to the toolbox.
securezones": [ { "id": 1, "name": "Member Only Area", "landingpageid": null, "createddatetime": "2020-10-20T14:59:54.347", "updateddatetime": "2020-11-12T16:07:27.113", "expirydatetime": "9999-12-31T06:00:00", "ExpiryOption": null, "ExpiryAfter": null, "AccessType": 0, "Plans": null, "CountPaidSubscribers": 0 }, |
|
Feedback Task |
Admin UI changes |
Task list:
|
|
Public Request |
"Already Taken" URL Validation |
Source: Description: Validation warning for general URL conflicts before saving item. ie: for Pages and other items not influenced by the Advanced URL Manager. 1) Update `Settings` -> `Misc` in group “Admin Panel Settings” with new setting “Disable autocomplete for already taken URL slugs” (default is ‘false’) 2) Logic If `true` - do not add `-1` to the slug on save. Throw validation error message "Warning: Duplicate URL" If false - logic should be as it was earlier. |
|
Public Request |
Add Default Styling For Pagination |
Source: Description: Currently pagination outputs raw unordered list. Apply some default formatting to remove the bullets from the list and make it horizontal. Also by default it would be nice to truncate the pagination with “…” and show the last page if there are over 5 pages. If we really want to get fancy we could make the default styling along these lines. 1) Component param Add param to component type `module` and `module_of_member`
2) Toolbox
Applies to the following modules:
|
|
Public Request |
Small UI tweak: Add Icons To Items Under "Content" Section |
Source: Description: Implement the icons in “Content” section that are already under the components insertion list. All other icons on the 2nd level should remain the same. Apply it to all default menus. Leave custom menus as is. Design: |
|
Public Request |
Pages/Template/General Editing Window |
Source: Description: Make the editing area fill the vertical space in the browser window. |
|
Public Request |
Recent Item Section |
Source: Description: A ‘Recent Items’ section to quickly go back into last page/module you were in, without having to navigate back to that page. Functionality
DESIGN |
|
Feedback Task |
Grouping product in toolbox improvement |
Show `this.id` as first option of ”Filter Value” field for following components in toolbox (show it before datasource loading process occurs) Ecommerce:
IF it's selected or NO item selected - show "{{this.id}}" as value |
|
Feedback Task |
Forms email aggregator |
Add new setting to `Form` -> `Settings`:
Add new setting to `Form` -> `Settings`
Add liquid variables of ”Confirm Email Notification” to the scope of the following system emails:
|
|
Feedback Task |
CRM -> Bookings: Export to Excel to be filtered by form name? |
Source Improve Bookings export (https://prnt.sc/vv97ic)
Update exporting logic so it will retrieve bookings based on selected forms and events |
|
BUG |
Infinity redirect on login to Portal |
Fix infinity redirect on SSO login to Portal |
|
BUG |
Toolbox bug in event group Component |
Custom Client Notes For Custom Fields
-
New 'Notes' field against any custom field created in the admin. It would display next to the field when clients are creating Custom Module items and could provide additional info to help them when entering content.
For example: with a image field, the note might read "This image is displayed as the thumbnail on your Team Members page and idealy...
- Custom Modules
Add Default Styling For Pagination
-
Currently pagination outputs raw unordered list.
Apply some default formatting to remove the bullets from the list and make it horizontal. Also by default it would be nice to truncate the pagination with “…” and show the last page if there are over 5 pages.
If we really want to get fancy we could make the default styling...
- Blogs
- Custom Modules
Admin UI changes (v5.9)
-
- Admin Proof Read/Suggestions: Admin Proof Read.docx
- Add info with site name and username to the header: See design
- Fix search in the data source. Currently, the search is working just from the start of the line.
- Alphabetic sorting of data sources.
- Alphabetic sorting of tags + button to sort from A to Z.
...
- Admin Panel
- UI/UX
"Already Taken" URL Validation
- Validation warning for general URL conflicts before saving item. ie: for Pages and other items not influenced by the Advanced URL Manager.
- General
Misc Improvements (v5.9)
-
- Set 404, 403 and 401 status codes when showing appropriate system pages
- Improve GDPR control, Contacts and advanced CRM groups
- Ability to "Favorite" a module item
- CRM -> Bookings: Export to Excel to be filtered by form name?
- Admin Panel
- General
- UI/UX
Pages/Template/General Editing Window
-
Make the editing area fill the vertical space in the browser window.
- Admin Panel
- Pages and Templates
Recent Item Section
-
A ‘Recent Items’ section to quickly go back into last page/module you were in, without having to navigate back to that page.
- UI/UX
Small UI tweak: Add Icons To Items Under "Content" Section
-
Implement the icons in “Content” section that are already under the components insertion list.
- Admin Panel
Full Release Notes
|
BACKLOG |
Module Duplication |
Function restriction upgrade: Allow copying module starting from Pro plan |
|
BACKLOG |
`ProductDataJsonHTML` to product detail layout |
Exclusively for Product Module: Automatically add {{this.ProductDataJsonHTML}} to the product detail if there is no manual output inside the layout |
|
BACKLOG |
Parent Child module links in module settings |
Add ability to switch between parent and child module via links. Useful if you want to go to Blog post settings from blog settings. Design - https://prnt.sc/skhen8 |
|
BACKLOG |
Search keywords field |
Added search keywords field to import/export |
|
BACKLOG |
Downloadable products: System Properties |
Add following fields to the system properties for Products module:
Design https://prnt.sc/skhijv |
|
BACKLOG |
Downloadable products: Processing Logic |
1) Add api to retrieve downloadable file
2) If product has been deleted - delete file as well. On delete - show popup: “You have downloadable file attached to the item and it will be deleted with the item. Are you sure you want to delete this item?” |
|
BACKLOG |
Downloadable products: Shipping Options logic upgrade |
HIDE shipping options only if ALL products in shopping cart has:
Return an undefined `Enable Shipping` value as `true` if:
OR
Otherwise it's `false` |
|
BACKLOG |
Downloadable products: Downloadable link for the order line liquid scope |
Add property `downloadableFileURL` to `order` line liquid object.
Modify thank you page and invoice email (default layouts) to show download link if order line is downloadable product Design https://prnt.sc/skhlt9 |
|
BACKLOG |
Downloadable products: Count downloads logic |
Add `Max Downloads Allowed` system field to product module:
If value is > 0
Else (value is 0 or empty)
|
|
BACKLOG |
Downloadable products: Downloadable link in admin |
Wrap the product name in `order -> products` tab with a link to downloadable file if it is a downloadable product. |
|
BACKLOG |
Stripe customers in advanced payment logic |
Modify payment via stripe logic.
As a result if same customer submits several payments - it will always be as one single record in vendor's stripe account. And they will have attached list of non-repeated credit cards that is based on tokens provided while payment. |
|
BACKLOG |
Attribute and attribute options ordering |
Provide ability to change order of the attributes and options for products via drag-and-drop functionality, which applies the ordering to:
|
|
BACKLOG |
Show number of products in all shopping carts |
Ecommerce -> Product -> inventory: Show number of items added to all shopping cart sessions under the label of: `Added to shopping cart` Add to general product and product with variations screens: |
|
BACKLOG |
Link to order on gift voucher |
Ecommerce -> Gift voucher edit page:
|
|
BACKLOG |
Add link to order from Case, booking |
Add link to order from:
|
|
BACKLOG |
Daily recurring subscriptions |
Add daily recurring subscriptions option to the secure zone.
|
|
BACKLOG |
Order Management Upgrade |
Split form submissions and booking subscriptions in orders detail page |
|
BACKLOG |
Grouped products form improvement |
Remove description field from the grouped product object. Leave display name only |
|
BACKLOG |
Add tax in product order line + extended tags |
Details here: Equivalents:
1) Add following properties to the order line liquid object:
Example of missing properties and its values: https://prnt.sc/rwvj2f
2) Add following properties to order (see above Example Spreadsheet for calculation definition)
|
|
BACKLOG |
Out of stock - hide product |
If product in inventory tab has Out of stock property value equals to `hide product` (https://prnt.sc/rseiyi) |
|
BACKLOG |
Instock logic review |
Change the logic to NOT storing reserved for shopping cart items in In Stock property:
|
|
BACKLOG |
Orders submission flow rework |
Save form submission data to stripe metadata when performing a payment. Once stripe sends success callback - create form submission record based on data in metadata field |
|
BACKLOG |
Add Shop settings page and Format settings update |
1) Create groups on the `Settings -> Misc` page Admin Panel Settings
Recaptcha settings
Shop settings
2) Extend `Currency and Format` settings panel (Settings > Domains > Currency and Formatting) Add `Use Custom Number/Currency Format` checkbox (https://prnt.sc/rrnzsp)
Params to be listed in user friendly way:
|
|
BACKLOG |
Country list management for shopping cart |
1) Add ability to choose what countries to show on the shopping cart. Add `allowedCountries` option to the {% component type:"countries" %} Value:
Example: {% component type:"countries", collectionVariable:"", allowedCountries:"US,AU" %} 2) Add ability to select countries via multiselect dropdown in the component toolbox |
|
BACKLOG |
nICE color picker z index issue |
Would it be possible for the algorithm to have a minimum z index of at least 100. It seems like it's calculating it at 5 on any complex website, there are going to be items that are over that z-index. |
|
BACKLOG |
Offline Credit Card Payment System page |
NOTE: To be renamed “Deferred Order Payment” Create new system page
Liquid scope of the page should include the `order` object (same as is accessible on checkout thank you page) Page should contain a new system form with:
Add to component toolbox ability to retrieve offline payment HTML form code
|
|
BACKLOG |
Offline Credit Card Payment Email |
NOTE: To be renamed “Deferred Order Payment” Add new System email
Liquid scope
|
|
BACKLOG |
Offline Payments flow |
NOTE: To be renamed “Deferred Order Payment” Provide ability to send Offline Credit Card Payment Email from the `Order -> Payments` tab (https://prnt.sc/rvjj8g)
Alternatively, provide ability to go directly to `Offline Credit Card Payment` system page URL (front-end) from this tab
When submitting a form from the Offline Credit Card Payment system page
Provide ability to set `redirectURL` param. Same as for general forms (form input field) Provide ability to use `jsonResponse=1` param. Same as for general forms |
|
BACKLOG |
Password change in CRM |
1) Add ability to change password for the CRM contact record. When admin changing password - send `Password Changed` system email 2) Add new system email `Password Changed`
|
|
BACKLOG |
Bulk delete booking subscriptions |
On `Event -> subscription` tab (https://prnt.sc/rq7cff) provide ability to
|
|
BACKLOG |
"Today" Button For Release/Expiry Date Functionality |
Add a "Today" button on Release/Expiry Date fields for making inputting date easier, as in BC. |
|
BACKLOG |
Payment Fields Appearance Management |
1) Add ability to manage layout that is generated by payment systems (https://prnt.sc/rsfhq7): Added two tabs:
Create list of fields based on the documentation below: 2) Apply chosen appearance settings to the payment fields within all payment forms' layouts Modify {% component type:"payment_form_fields", formAlias:"{{this.alias}}" %} layout or payment script JS GET params for this task. |
|
BACKLOG |
Case Insensitive URL redirect param |
1) Add additional checkbox field to specify if url redirect is case sensitive or not.
logic:
2) Add column to list layout for Is Case Insensitive property
|
|
BACKLOG |
Control default styles and scripts |
Provide ability to disable auto-added default CMS assets to the head section of pages. Under `Settings -> Misc => CMS Assets Management` 1) Global Settings Fields (and show which resources not to add to the head):
2) For the Content Template Provide same list of fields on the `Content Template` add/edit layout to override global defaults (ie: use global setting by default) 3) Implement logic to check CMS Assets Management settings in the Content Template (or in the Global Settings if Use global setting option is selected for the template). |
|
BACKLOG |
Re-apply folder detail instead of page detail layout for folders |
Check if there are Page Folder items that have applied detail layout with ID 1525 (Page Detail) If found - attach to them Folder Detail layout (ID 1519 ) and save item. |
|
BACKLOG |
| set_money_format And | set_number_format upgrade |
Modify liquid filters
Parse argument the following way
|
|
BACKLOG |
Add URL to order line |
Add URL to order line liquid object. Redo `shopping cart` system page and `invoice` layouts to wrap product name with the link to the product. |
|
BACKLOG |
Add .dwg format to the staticContent section |
Add “.dwg” extension to the list of allowed to be accessed via URL (Static content list) |
|
Misc |
Order migration (old data to new) |
Migrate order that was created not by Advanced Payment Flow to the latest version of the orders logic. Apply main order param for the orders that was created for recurring payments (secure zone subscriptions) according to the latest version of the orders logic . |
|
BACKLOG |
this.order in workflow emails scope |
Add this.order object (same as added in invoice email) to the workflow email liquid context if form has "Accept Payment" option enabled. If no order was created during form submission - set this.order to null |
|
BACKLOG |
Add to cart - param for button text |
Add buttonName param to: {% component type: "ecommerce_add_to_cart" %} {% component type: "ecommerce_buy_now" %} Example: {% component type: "ecommerce_add_to_cart", buttonName: "Add Me!!!" %} Default value is empty Replace in default layout: `Add to cart` text to `{{this.buttonName | default:"Add to cart"}}` Replace in default layout: `Buy now` text to `{{this.buttonName | default:"Buy now "}}` |
|
BACKLOG |
Type Media module item property UX upgrade |
Change the algorithm of opening file manager when clicking icon for Type Media module item property https://prnt.sc/sjsoxe:
|
|
BACKLOG |
Modify shopping cart object |
1) Add `eCommerceItemId` to the shopping_cart order-line object 2) Add attribute images to the order `options` object SOURCE: Use-case for having access to this data: Not directly having the product ID meant I had to look up the product via SKUCode instead which isn't as stable. |
|
BACKLOG |
Remove Product from cart data attribute selector instead of <tr> (ecommerce.js) |
Modify the functionality, when removing product from cart, so it will try to find parent HTML element by data attribute `data-cms_cart_order_line_holder`. Add autoFix of the shopping cart layout on our template and sites created based on ecommerce template (for the backward compatibility.) |
|
BACKLOG |
Rebuild module after import module items |
Set to queue entire module rebuild when import module items process is finished |
|
BACKLOG |
Priced ...HTML properties decimals after dot fix |
PriceHTML and other ...HTML properties render to 4 decimals. Should render such number of decimals as configured in Format Settings attached to the current domain |
|
BACKLOG |
Add Paginate items parameter for component type module, module_of_member |
Add new parameter to the {% component type:"module" %} and {% component type:"module_of_member" %}
|
|
BACKLOG |
Order -> Payment tab UX improvement |
View Total cost and pending cost on the page. When click pay by cash - automatically preset amount equal to pending cost Design: https://prnt.sc/skioca |
|
BACKLOG |
12-24 hrs format switcher for admin datepickers |
Add switcher between 12 and 24 hrs formats on datepickers on `Settings -> Misc` page. Datepickers hrs time format (select) (options): - 12 - 24 Applied to datepickers throughout admin. |
|
Bug |
Duplicating Event |
When duplicating an event item Expected: Actual: Duplicated item has same subscribers counter as original item has https://prnt.sc/rv91k4. |
|
Bug |
Parent Child module links in module settings - disappear icon "Folder" |
Go to Settings Blog and select Items List View http://prntscr.com/sbq62x After saving Folders icons are disappear as well as path to Blog Post settings http://prntscr.com/sbq6ms When showing settings tab CMS should return system modules parent-child linkage in order to not override it when saving other settings of the blog http://prntscr.com/sbqbz1 |
|
Bug |
Bug from forum - not correct import URLs |
https://forum.treepl.co/t/url-slug-changes-not-updated-on-item-import-bug/1002 |
|
Bug |
Tax deleting error |
When deleting a tax sometimes we get Internal error: |
|
Bug |
Inventory - When Out of Stock hide button |
|
|
Bug |
Bugs from forum - Secure Zone Question |
|
|
Bug |
Bugs from slack - disappear product on Thank you page |
Products on the Thank you page are disappeared http://prntscr.com/r7ukr9 |
|
Bug |
Bugs from slack - error when related item disable |
|
|
Bug |
Bugs from slack - import/export |
A product export file re-imported presents ‘Internal Error’. |
|
Bug |
Bugs from slack - error when apply discount with currency DKK |
|
|
Bug |
Choose different shipping info |
|
|
Bug |
Bug from forum - Liquid code to list files from a particular directory |
https://forum.treepl.co/t/liquid-code-to-list-files-from-a-particular-directory/928/2 |
|
Bug |
Products - add check on Minimum Units and Maximum |
Add validation of these fields: Minimum Units and Maximum Units https://prnt.sc/riulyw when adding products to cart |
|
Bug |
Bug from client - import/export CRM |
Add ability to edit Type SOURCE: I am seeing an "Excel row number: 2. Detail: Invalid member type." on all 20 lines I try to import to the CRM, but there is no "type" in the file? The only row that works is the first and they all look similar? The first line is exported from the CRM to have something to work from. |
|
Bug |
[UI] Unruly link manager in WYSIWYG editor |
https://forum.treepl.co/t/unruly-link-manager-in-wysiwyg-editor/1003 |
|
Bug |
Bugs from slack - payment unsuccessful |
Fix the workflow sending when eWAY payment is unsuccessful http://prntscr.com/rre3lp |
|
Bug |
Bug from client - change logic Exclude from Catalogs |
|
|
Bug |
Bug from forum - Mandatory Custom Module Fields Reflect in User form |
https://forum.treepl.co/t/mandatory-custom-module-fields-reflect-in-user-form/1054 |
|
Bug |
Bug from client - not correct time in invoice |
|
|
Bug |
Portal Bug from slack - doesn't duplicate Feature flag |
|
|
Bug |
Popup with shopping cart - doesn't display total price |
|
|
Bug |
Workflow - doesn't changes name of workflow |
|
|
Bug |
Search forms - doesn't display SKU Code, Seo title and Meta description |
|
|
Bug |
Bug from Adam - not correct show price when set up 2 prices |
|
|
Bug |
URL output {{request.request_url.href}} is fixed (was broken and accessible via incorrect alias: {{request.request_url.ref}}) |
“href” param is broken and outputs via “ref” instead. |
|
Bug |
Bug from Peter - edit name Catalogs |
Change catalog name and click save Go to the list of the catalogs Catalog name is not changed http://prntscr.com/sh8xf5 |
Misc Improvements (5.3)
-
This list of improvements is gathered from Treepl users' feedback from forum and support:
- Ability to copy existing custom module "Pro" plan
- Parent child module links in module settings
- search keywords field to import/export
- nICE color picker z index issue
- Case Insensitive URL redirect param
- Add option to disable default styles and scripts in Misc settings
- Re-apply folder detail...
- Ecommerce
Ecommerce Improvements (5.3)
-
This list of improvements is gathered from Treepl users' feedback:
- Auto add this.ProductDataJsonHTML to product detail layout
- Stripe customers in advanced payment logic
- Attribute and attribute options ordering
- Show number of products in shopping cart in the product
- Link to order on gift voucher
- Add link to order from Case, booking
- Daily recurring subscriptions
- Order Management Upgrade - final...
- Ecommerce
Deferred Order Payment
-
Ability to manually pay for order through a dedicated system page (link is available through admin).
- Ecommerce
Downloadable Products
-
Ability to create downloadable products (files).
It will operate similar way it did in BC.
- Ecommerce
"Today" Button For Release/Expiry Date Functionality
-
Add a "Today" button on Release/Expiry Date fields for making inputting date easier, as in BC.
- Custom Modules
- UI/UX
Full Release Notes
|
Beta |
Features moved out of Beta |
These features work consistently now and have been implemented into the CMS:
NOTE: Any feature flag will go through this flow:
|
|
Beta |
New Liquid engine &nICE v2.0 |
New Liquid engine & nICE 2.0 + nICE v2.0: The ability to use style options like bold, italic, colors, etc in nICE editor interface. New styles interface is available for all content except for module item properties that don’t have a field type of ‘multiline’ or ‘WYSIWYG’ (ie: date/time fields, single line string fields, etc). NOTE: This feature requires valid HTML for proper nICE 2.0 operation in edit mode. + New Liquid engine: IMPORTANT: After enabling this feature, please check all site's custom liquid and JS implementations. The output will be different for old and new liquid engine: Also, if you are using the {{params}} variable make sure you are using it via {{this.params}}. The names of the custom params will also be in camelCase http://prntscr.com/oh82n5 Forum discussion on the topic of params: https://forum.treepl.co/t/new-liquid-engine-changes-to-referencing-parameters-in-custom-layouts/517 This feature flag will be available in beta for 2 sprints and then also will be auto-enabled for all sites. |
|
Beta |
Multi-level Categories |
Advanced multi-level categories The feature allows creating multi-level categories. + New ‘ItemCategoryIdList’ property added to Liquid scope: New property stores comma separated list of category IDs (existing category property stores list of category Names) Existing: {{this['ItemCategories']}} New: {{this['ItemCategoryIdList']}} + Convert Categories to nested categories On appstart if categories wasn't previously converted, for each category:
+ New interface when creating categories/subcategories Design - http://prntscr.com/oh6ht2 Categories now sorted in the tree structure. By this button: http://prntscr.com/nod8lh the user is able to create a new category. The user is also able to create/remove/rename the category/subcategory clicking on this button: http://prntscr.com/nodeyz . User is able to change the name of the category/subcategory: http://prntscr.com/noddvd . If the user created/changed the name of the category/subcategory and clicks anywhere but not on this button: http://prntscr.com/nodg1b changes should not be saved. + Ability to create/edit categories using the new interface when within a module item Design - http://prntscr.com/oh6i7v If user wants to assign the category to the module there should be the dropdown: http://prntscr.com/npvqod where the level number will be indicated with (----). + Default Parent category setting For modules where you have access to its properties ("Edit Module">"Item Properties">"Default Properties") There will be the ability to specify the parent category to be used when creating/editing module items. The default selection is the Root category level (value -1). if set to any category, than only the subcategories of the set category will be available to the module items (in both the Category field and the pop-out side panel as a tree of categories when clicking ‘Add new category button’. + Change import/export format for categories. Old format example:
New format example:
Change method type from "Get" to "Post" + Change logic for category filtration:
+ Addition of new component tag of type "categories" Component pattern: {% component type:"categories", parentCategory:"[[parentCategoryId]]", levelsDeep:"[[numberOfLevelsToRender]]", collectionVariable:"[[variableName]]" %}
Example: {% component type:"categories", parentCategory:"111", levelsDeep:"2", collectionVariable:"myVar" %} Renders virtual layout by pattern below: <option value="[[itemContext.fullName]]">[["----" x (itemContext.level-1)]][[itemContext.name]]</option> Liquid output example (of “myvar”): { "items": [ { "NestingLevel": 2, "FullName": "Cat 2/SubCat 1", "Id": 112, "Name": "----SubCat 1" },{ "NestingLevel": 2, "FullName": "Cat 2/SubCat 2", "Id": 113, "Name": "----SubCat 2" } ] } NOTES: On generation of ‘search module form’ modification shown in ACCEPTANCE CRITERIA - see further below. Replicate the same to ‘create module form’ Replicate the same to ‘edit module form’ + Component Toolbox shows category tree In the toolbox (for custom module, blogs, events, etc) when selecting filterBy ‘itemCategories’ - display options as flat tree in filterValue field in the format described below:
|
|
Backlog |
New Email Accounts |
Add Email accounts tab on live site edit page (in portal.treepl.co) Design - http://prntscr.com/oh730f Flow:
Email CRUD layout provides ability to:
|
|
Backlog |
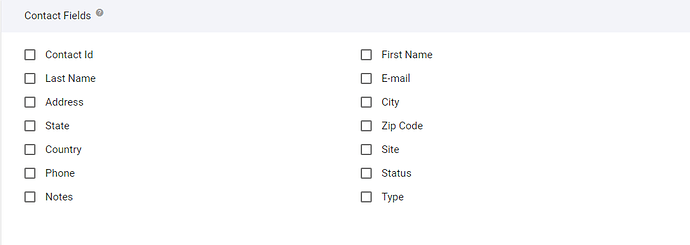
Contacts Import/Export flow |
Import/Export flow. Fields:
Notes: Only ‘Secure Zone’ and ’Secure Zone Expiration Date’ cells will be imported for those additional secure zone rows added under a contact’s record (with no email address present). All other cells will be ignored in these rows. |
|
Backlog |
Admin Roles - Import Contacts |
Extend restrictions list for admin roles.
If ’Can Import Contacts’ = false - disallow importing Contacts action for Admins with such roles. Existing configured roles have this disabled by default. |
|
Backlog |
Multiple Workflows enabled on Business plan |
Unlock Workflow notification Create / Read / Update / Delete operations for Business plan to enable multiple workflow capability. Now restricted only to having different Workflow Emails for those notification. (Multiple Workflow Emails remain only on Pro/Pro+ plans) |
|
Backlog |
Ecommerce menu items |
Set all sub items in Ecommerce menu as inactive: eCommerce
|
|
Backlog |
Data Source Property - Default Empty Option |
Original issue: For Custom Module Data Source fields, it was not possible to be set back to null/empty after a selection was assigned. Now an empty ‘Please select’ option is available. |
|
Backlog |
Re-index module button |
Added ability to re-index only one particular module http://prntscr.com/oh898g Useful for selectively re-indexing specific modules only or to resolve possible issues with specific module search. |
|
Bug |
Force disabling from search engines for all trial sites |
Force addition of <meta name="robots" content="noindex, nofollow"> meta tag (regardless of page property "Disable from search engines") for any page request under subdomain of *.treepl.co or *.trialsite.co |
|
Bug |
BUG: SEO Priority Default Setting |
Original bug summary: https://treepl.co/public-backlog-state/request/bug-seo-priority-default-setting Custom Modules default SEO Priority is only visually applied in admin view and does not actually apply until SEO tab is saved. Solution: Apply the Default Priority field value to any newly created item (http://prntscr.com/nvztgl ): - Front-end form
- Admin add item form
- Import process
|
|
Bug |
BUG: {{this.member}} data does not output to system Invoice email |
Original bug summary: {{this.member}} data does not output to the system Invoice email layout. |
|
Bug |
Custom module - Content Template changed upon front-end update |
Steps to reproduce:
Expected:
Actual:
|
|
Bug |
Advanced search - doesn't search in blog |
Fixed the issue that reindex process wasn’t indexing the items that where located in “folder/group” items (like posts in blogs or pages under some page folders). |
|
Bug |
BUG: Spaces generated in form code |
Original bug summary: https://forum.treepl.co/t/bug-spaces-generated-in-form-code/474 Generated form code for Event and Payment fields had incorrect spaces in the HTML syntax. |
|
Bug |
Update item from front-end would clear info when update |
Steps to reproduce:
Expected
Actual
|
New Email Accounts
- Ability to create new email accounts for every hosted/activated site from Treepl Portal. Currently, you can request email accounts to be created by emailing to support@treepl.co
- WebinOne Portal
BONUS: Advanced Multi-level Categories
-
Ability to create and easilty manage global multi-level categories.
Currently available as one of the "Beta Features" and needs to be enabled manually on every Treepl site.
- Admin Panel
- General
Contacts Import
-
The ability to import/export CRM contacts. For example for users of secure zones that should be imported from BC
- CRM
- WebinOne Portal
BUG: {{this.member}} data does not output to system Invoice email
-
{{this.member}}data does not output to the system Invoice email layout.
It works on the system Workflow email but not the Invoice....
- Bugs
BUG: SEO Priority Default Setting
-
In Custom Modules, when the SEO Priority default is set (under step 2. Item Properties), it is visually applied in admin view for all existing and new items but doesn’t actually apply to the item (not reflected in sitemap or in Liquid...
- Bugs
BUG: Spaces Generated In Form Code
-
When adding Event and Payment fields to a Form, the generated HTML code has incorrect spaces forming.

- Bugs
Full Release Notes
|
Backlog |
Site speed increase |
Performed CMS code optimization that slightly increase working speed of site pages (up to 15%). |
|
Backlog |
Liquid Context Rendering |
New liquid object of {{LiquidContext}} to output all the available liquid for the current layout. eg: {% assign myCustomVar = "some value" %} {{liquidContext}} OUTPUT: { "this" : { "Name": "value", "Description": "value" ... }, "request" : { "request_url": {...}, "currentmember": {...} ... }, "myCustomVar" : "some value" } |
|
Backlog |
URL Redirects Import/Export |
Ability to Import/Export URL redirects using an .xlsx file. |
|
Backlog |
Global Variables (Site Information) Builder |
The ability to have a "Site Setting" App, where it is possible to add settings for the client that one could then feed and use throughout the entire site. It could be things like logo, phone, email, address etc. With the ability to have the option of setting the liquid names/aliases so the tags are customisable. So instead of having for example something like {{siteInformation.companyContacts.webAddress}} one could specify an alias like {{si.cc.web}} |
|
Backlog |
Toolbox -> Global variables (Site Information) |
Add ability to get Site Information tags via the toolbox. Toolbox options:
|
|
Backlog |
Secure Zone Subscriptions + Expiry dates |
Added 2 system fields to the form builder relating to Secure Zones:
Creating the input fields: <input type="date" name="SZ_ExpiryDate"> <input type="number" name="SZ_ExpireAfterDays">: User is not able to save the form with two chosen options. If both options are present in the form the Expiry Date field will have priority. |
|
Backlog |
Secure Zone Expiration Settings |
Create a new option on the Secure Zone Page:
|
|
Backlog |
Add .kml, .kmz extension to allowed extension list |
Add allowed file extensions:
|
|
Backlog |
Categorized rendering of events in the calendar. |
Now using the component toolbox you can generate the calendar include widget that will render calendar of events by category. |
|
Backlog |
Import/Export of the detail layout |
Now you can specify detail layout id in import and export file for module items. |
|
Backlog |
Data Center displaying in the portal. |
Fixed the displaying of the data center in the partner portal. Partner should be able to see the actual information of which data center the website is located. |
|
Backlog |
Module lists in Admin to list by release date |
Item lists in admin where release date is relevant now can be sorted by the release date column header. |
|
Beta |
Advanced search feature |
Advanced search added to beta. This feature uses new module index that allows retrieving searched module items in module search faster. Current feature impacts:
ATTENTION: all features under beta will be released one or two sprints after their released sprint. Some of them may change the logic already implemented (by way of improvement). So check if these features impact your site before the full feature release. |
|
Beta |
(HOTFIX) Calendar toolbox builder - default options logic change (when BETA Advanced Search enabled) |
If Advanced Search BETA feature is enabled: Toolbox -> Event -> Calendar generation will be changed:
Old logic (if flag is off) :
System will support both legacy version of the calendar and new version of the calendar. |
|
Beta |
Remove “Disable from site search” influence on MODULE specific search |
Beta setting: Improved module search Removes the effect of "Disable from site search" property for module specific searches. Site search will not be affected by enabling this feature. "Disable from site search" property should only be used for Site Search. |
|
Bug |
Time with calendar - on IOS |
On iPhone if site has timezone set to “–GMT” - events were displayed one day back on certain time set on users device. |
|
Bug |
Form - Options in reverse order |
Form fields that have options (ie: checkboxes, radios, dropdowns...) would have those options listed in reverse order in the generated layout |
|
Bug |
Admin - List View Pagination |
When updating a custom module item on page 20 for example it jumps back to page 1. Which is frustrating if wanting to update multiple items on page 20. |
|
Bug |
Suspend Site text truncated |
Descriptive text for Site Suspension options is truncated. |
|
Bug |
Bug with liquid |
Module component tags configured with pagination would show total items count as the value in the ‘limit’ parameter. Should shown total items count. As a result generated pagination shows incorrect page numbers. |
|
Bug |
Event item showing on calendar before release date |
Event item with release date in the future incorrectly shown on the calendar when it should not show at all until release date reached. |
URL Redirects Import
-
Ability to import URL redirects using a .csv file.
Including PDF’s, media items, images, urls ending with a forward slash “/” and unusual urls that include special characters like &, =, $ or .aspx, .php etc. Ability to create wildcard redirects
- General
- SEO
Global Variables Builder
-
The ability to have a "Site Setting" App, where it is possible to add settings for the client that one could then feed and use throughout the entire site.
It could be things like logo, phone, email, address etc.
With the ability to have the option of setting the liquid names/aliases so the tags are customisable. So instead of...
- Admin Panel
BONUS: Form Fields Sorting
-
Sorting of form fields when making a form is reversed in the final layout.
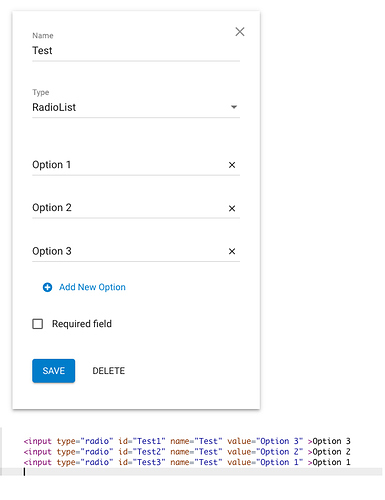
- Forms
Liquid Context Rendering
-
The ability to output all available liquid on the current page.
The BC equivalent would be {{this|json}}
...
- Liquid
Full Release Notes
|
Backlog |
Ability for partners to block the admin access and pause the websites for clients which are not paying. |
If a partner chooses the soft option:
If a partner chooses the hard option:
|
|
Backlog |
Ability to add multiple domain names to a website and point to different landing pages. |
If the home page isn't set at all, there should be a customisable system page displayed. ‘Settings’ > ‘System Pages’ > “missing-home-page”
If the visitor enters on the custom domain of the current website;
|
|
Backlog |
Update Liquid To Include Date & Time Filters |
Added date filters: site_date {{ “now” | date }} outputs "09-Jan-2015" site_datetime {{ “now” | datetime }} outputs "09-Jan-2015 02:46 PM" date_utc {{ “now” | date_utc }} converts a date to UTC (assuming that the date is always given in the site’s timezone) date_add myDate - filter input should be a date time object or a string convertible to a date time object amount - an integer number or a string convertible to an integer number representing the amount of date or time units to add (if positive) or to subtract (if negative) from the input date time object datePart - a string representing the date or time parts to be added or subtracted. The allowed values are:
E.g. using either one of the variables below: 3016-06-15 12:30:30Z will output 3016-06-15T12:30:30 2016-09-15 12:30:30Z will output 2016-09-15T12:30:30 2016-06-30 12:30:30Z will output 2016-06-30T12:30:30 2016-06-16 08:30:30Z will output 2016-06-16T08:30:30 2016-06-15 11:50:30Z will output 2016-06-15T11:50:30 2016-06-15 13:00:30Z will output 2016-06-15T13:00:30 2015-06-16T08:30:29.900 will output 2015-06-16T08:30:29.900 If one of the parameters is of an incompatible type or value, the filter will not alter the input. |
|
Backlog |
Contact assignment to the Secure Zone. |
Admin able to set/edit the expiry date of the secure zone for a contact The configuration can be managed in the contact setting - http://prntscr.com/nip1uq. |
|
Backlog |
Default Expiry date for the Secure Zone. |
If any of the forms have a secure zone, but the expiry date for it isn't specified, the default expiry date should be 31-Dec-9999. |
|
Backlog |
System Page if the access to the Secure Zone is expired. |
If the expiry date of the contacts secure zone subscription is bigger than the set expiry date, the system should show the system page (403). The user should not be able to enter the secure zone by any means until the expiry date is less smaller than the current one. |
|
Backlog |
Change SEO Title To Meta Title In Liquid Properties |
{{this[‘MetaTitle’]}} Added and renders the same value as {{this[‘SEOTitle’]}} |
|
Backlog |
Timezone for form submissions |
The form submission times in the CRM now showing time in site timezone. |
|
Backlog |
Customise the “Create New” item name in modules |
Admin is able to add the name for the "Create New" button on the "treeView" for modules: The field where the admin can add the Alternative Item name - http://prntscr.com/nl0ow4. The name for the "treeView" module should be displayed here - http://prntscr.com/nl0oob. |
|
Backlog |
Add support of .webp images |
Add support of files with extension: ".webp" type: "image/webp" |
|
Backlog |
UI Improvements |
File Manager:
Modules:
Component Manager:
|
|
Backlog |
URL Redirect 302 status code changed to 301 |
Change current
|
|
Bug |
URL redirects with .html extension as source |
Any url redirect that is added to the system with .html as the source url won’t redirect. Another usability issue is that when you make a change to a url and go ‘back’ it takes you back to the first page of results every time and not just back to the page you were up to. It also defaults back to 20 results instead of 50. |
|
Bug |
Import/Export - doesn't react to Disable for site search |
|
|
Bug |
Change Timezone - event in calendar displays one day back |
|
|
Bug |
Custom Module and Event pagination no display results |
When using Custom Module or Events search module with pagination, the paged views don’t show any items. |
|
Bug |
New Image manager not recognizing .jpg images |
Image manager in WYSIWYG editor not displaying .jpg images in the file system and so cannot be selected. |
|
Bug |
New Image manager - breadcrumbs don't work correctly |
Image manager in WYSIWYG editor not displaying breadcrumb/folder location correctly if reopening the image manager for a second time. |
|
Bug |
Create item from front end - change type |
Expiration Date input in the Create/Update Item forms is added as a type=“text” input - suggest changing to a type=“date” (as per custom properties dateTime fields) |
|
Bug |
Business plan - disable advanced settings |
Sites on Business plan had Advanced Settings enabled for Custom Modules when they should be disabled. |
|
Bug |
Set at Home and nICE |
Page with ‘Set as Home Page’ enabled will revert to disabled if saved via nICE editor. |
|
Bug |
Default priority - doesn't save during import |
|
|
Bug |
New Image manager - show full breadcrumbs |
|
|
Bug |
Set up Time zone on create item in Custom module |
User-submitted Custom Module items are not honouring site timezone for release date and expiry date IN THE WEB FORM RESPONSE - actual dates in the admin and when later rendering on site are correct. Initial response Release date
is always different. |
|
Bug |
Create item from front end - expiry days issue |
With ‘Expiry Days’ set for user submitted custom module (http://prntscr.com/nfs5pk) On item submission item is created with system default expiry date + expiry days - but should be calculated from today’s date http://prntscr.com/nfqq1b |
Multiple Domain Names
- Ability to add multiple domain names to a website and point to different landing pages.
- SEO
Pause Clients Which Are Not Paying
-
The ability to pause clients access to the admin and their email if they are not paying their bills.
- WebinOne Portal
BONUS: Alternate Name Of Custom Module Item
-
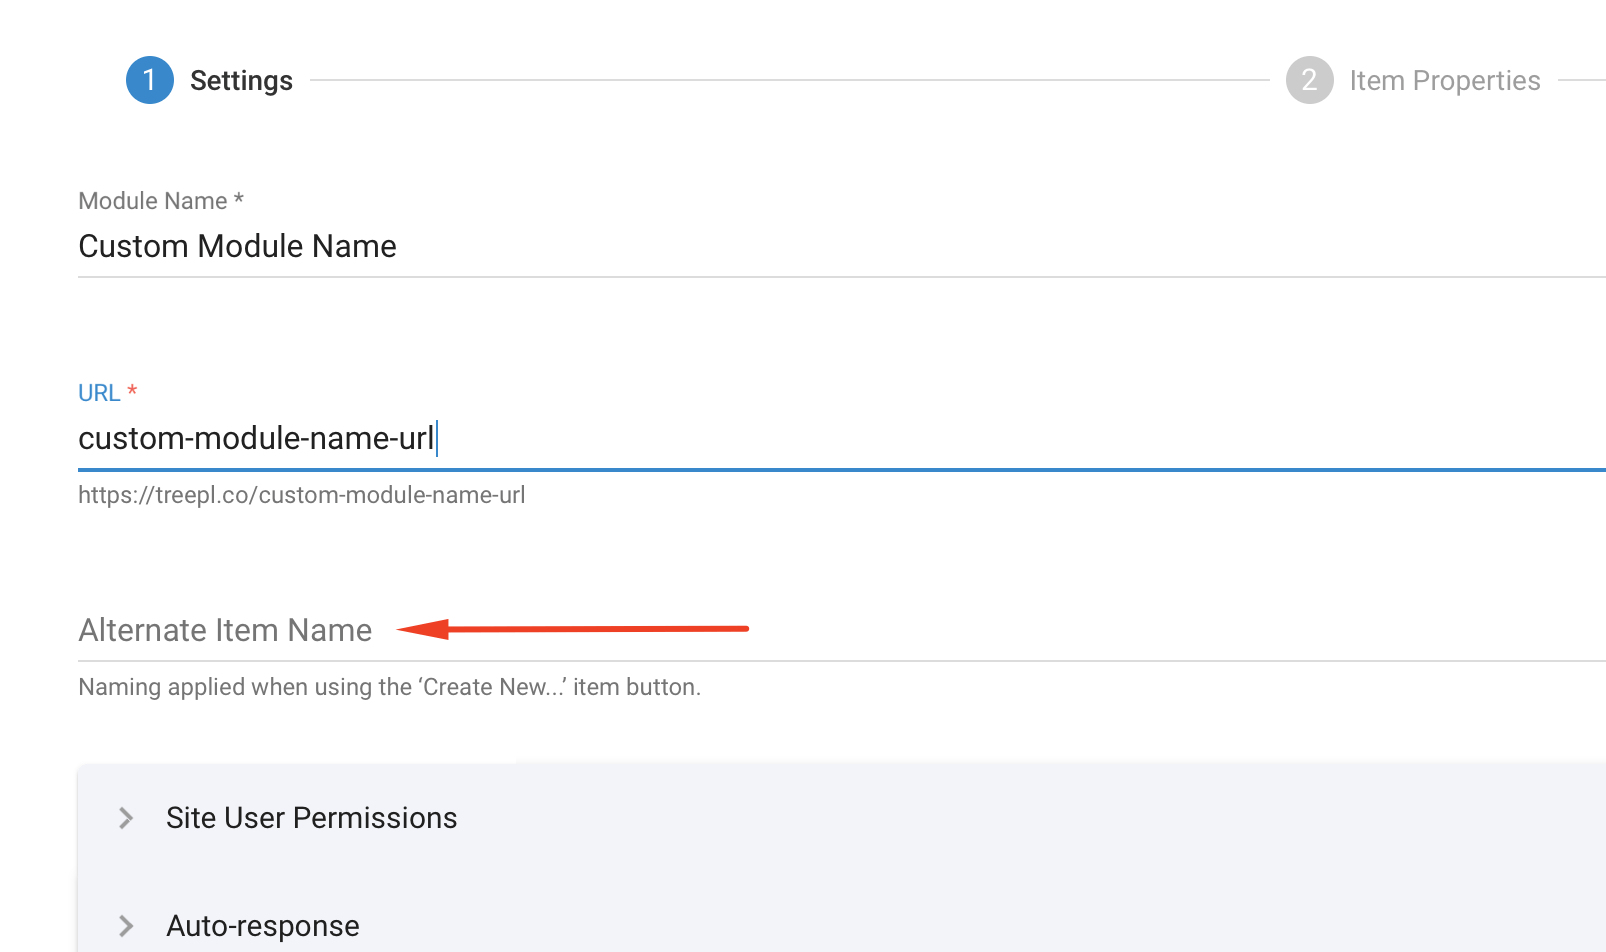
Ability to set a custom name for custom module item.
Very useful when using nested custom modules.
- Custom Modules
BONUS: “Author” and “Added By” fields to include links to those CMS items
-
Add a link to the CRM record next to any “Added By” field.
Add a link to the Author item next to any “Author” field.
- CRM
BONUS: Change SEO Title To Meta Title In Liquid Properties
-
Version 3.2 brought a change to the SEO section changing the ‘SEO Title’ field name to ‘Meta Title’.
It would be great to have this passed through to the Liquid property naming also for consistency.
ie: {{this.metatitle}}
We may need both {{this.seotitle}} (old) and {{this.metatitle}} (new) available for backwards compatability
...
- Liquid
- SEO
BONUS: Duplicate, Download Files & Folders
-
- Ability to download file from File Manager
- Ability to download folder from File Manager (as a seperate zip file)
- Ability to duplicate file and/or folder in File Manager
- Files and folders to render in alphabetical order
- File Manager
BONUS: Expiry Dates For Subscriptions
- Functionality for admins to set expiry date for a customer to access a secure zone. (eg: access expires 31.12.2019)
- Member Area
Update Liquid To Include Date & Time Filters
-
Date Filters can be very important to web sites that use dates and calendering.
See the following link for BC's Date Filters:
Link to BC docs
- Liquid
Full Release Notes
|
Backlog |
Code View In Custom Module WYSIWYG |
For Custom Modules, the ability to switch to “Code View” in custom WYSIWYG fields. |
|
Backlog |
Menu Layouts and layoutGroups management |
Add Menu layouts and layoutGroups management to the admin similar to other module layouts. 1) User should be able to create new layoutGroups Creating layoutGroup should create folder in "/Content/MenuLayouts/[menuAlias]/[layoutGroupName]" and create there 3 files with default content. 2) User should not be able to delete Default layoutGroup. 3) User should be able to edit any layout inside layout group. 4) Creating new menu should create "/Content/MenuLayouts/[menuAlias]/Default" folder and insert default layout there instead of the previous location "/_MenuLayouts/[menuAlias]". |
|
Backlog |
Menu LayoutGroups FTP changes |
FTP changes (for app start if _MenuLayouts" folder exist): 1) Copy "_MenuLayouts" folder from ftp root to "Content" folder. Rename it to "MenuLayouts": 2) Inside each menu alias named folder in "/Content/MenuLayouts/" folder - create Default folder. Move layout files from the "/Content/MenuLayouts/[menuAlias]" to "/Content/MenuLayouts/[[menuAlias]]/Default" folder. 3) Go through every layout "*.layout" file inside each "/Content/MenuLayouts/[[menuAlias]]/[[layoutGroup]]" folders and change the include string part like this: /_MenuLayouts/{{this.alias}} to /Content/MenuLayouts/{{this.alias}}/{{this.layoutGroup}} |
|
Backlog |
Add Menu LayoutGroups to liquid component |
Extend module component to use layoutGroup param: {% component type: "menu", alias: "test", layoutGroup:"myCustomLayout" %}
layoutGroup should work the way described below:
Liquid changes: add layoutGroup to this scope |
|
Backlog |
Upgrade menu in component toolbox |
Selecting menu should be similar to Event subscription form: Default value for layoutGroup should be "Default".
{% component type: "menu", alias: "[[someAlias]]", layoutGroup: "[[selectedLayoutGroupName]]" %} |
|
Backlog |
‘Delete all items’ button (improved UI) |
Add button "Delete all items" to bulk action list on list-view of a module. Confirm window should be the same as for existed bulk delete action. If user leaves the page while deleting process still
running - show alert message: It will continue after you leave this page. Design: http://prntscr.com/nd9k2w |
|
Backlog |
Custom Module - Properties - Advanced custom property editing |
Ability to change custom module custom property data types. Add alert message when type change will cause irreversible data changes: WARNING: changing field type will cause data loss. Do you wish to proceed anyway? Transformations are based on rules described in the documentation for Custom Modules. |
|
Backlog |
Edit & Re-shuffle Tags In Modules |
Add ability to edit "Tags" in modules. Add ability to reorder tags. |
|
Backlog |
Image manager in wysiwyg |
Ability to access the file manager for image placement within WYSIWYG tools. |
|
Beta |
Import/Export feature improvement |
Extended version of import/export file. Add “disable from site search” property to the import/export file Beta feature: Activate by checking the ‘Advanced Module Import/Export’ flag in the Beta area. |
|
Bug |
Release date issue on module items |
When creating custom module item - its release date saved with incorrect hours. When click save again - date is changed again until release date is changed to +1 day. Expected: Release and expiry date should be saved with time 00:00:00 in the site's timezone. Time part of the submitted datetime should be fully ignored - just force 00:00:00 in the site's timezone Resaving should not change the time. |
|
Bug |
“site.webmanifest” Files Not Supported |
"site.webmanifest" files are not accessible via their URLs and are therefore not usable by browsers and other applications. Expected: When adding site.webmanifest file with content to ftp root. Go to /site.webmanifest url. Access file's content. Actual: HTTP ERROR 404 |
|
Bug |
Login to admin - can't access first few times |
Issue with admin login not allowing access and returning to the login screen several times before finally allowing access. |
|
Bug |
Site Search With Multiple Keywords |
Site search using more than one word as the search term is not returning any results, even with site reindexed. |
|
Bug |
Link Manager Changes the Link text |
When using the Link Manager in the WYSIWYG editor for linking to a page, the Link Manager will overwrite the text selected as link with the name of the page. Example: "This is my LINK" Then select "LINK" and go to the Link Manager and choose "Page" and then choose a page called "Test". Your link will now show: "This is my Test" instead of still showing: This is my LINK" |
BONUS: Lawyer Template
- New custom grid template "Lawyer" is available from Partner Portal for all types of users.
- Templates
BONUS: Photography Template (Foundation)
- New Foundation template "Photography" is available from Partner Portal for all types of users.
- Templates
BONUS: Custom Module Import/Export
-
1) Extended version of import/export file
2) Add disable from site search property to the import/export file
- Custom Modules
BONUS: Edit & Re-shuffle Tags In Modules
-
Ability to edit and shuffle “Tags” in modules. Right now, you can only add. So, if you make a mistake, misspell, etc, you need to delete the tag and re-add it again.
Also, would be nice to have the ability to re-shuffle tags (i.e. order of tags)
- Custom Modules
Code View In Custom Module WYSIWYG
-
The ability to go to “Code View” in custom WYSIWYG field in Custom module. (Not in the native item description field where is works already)
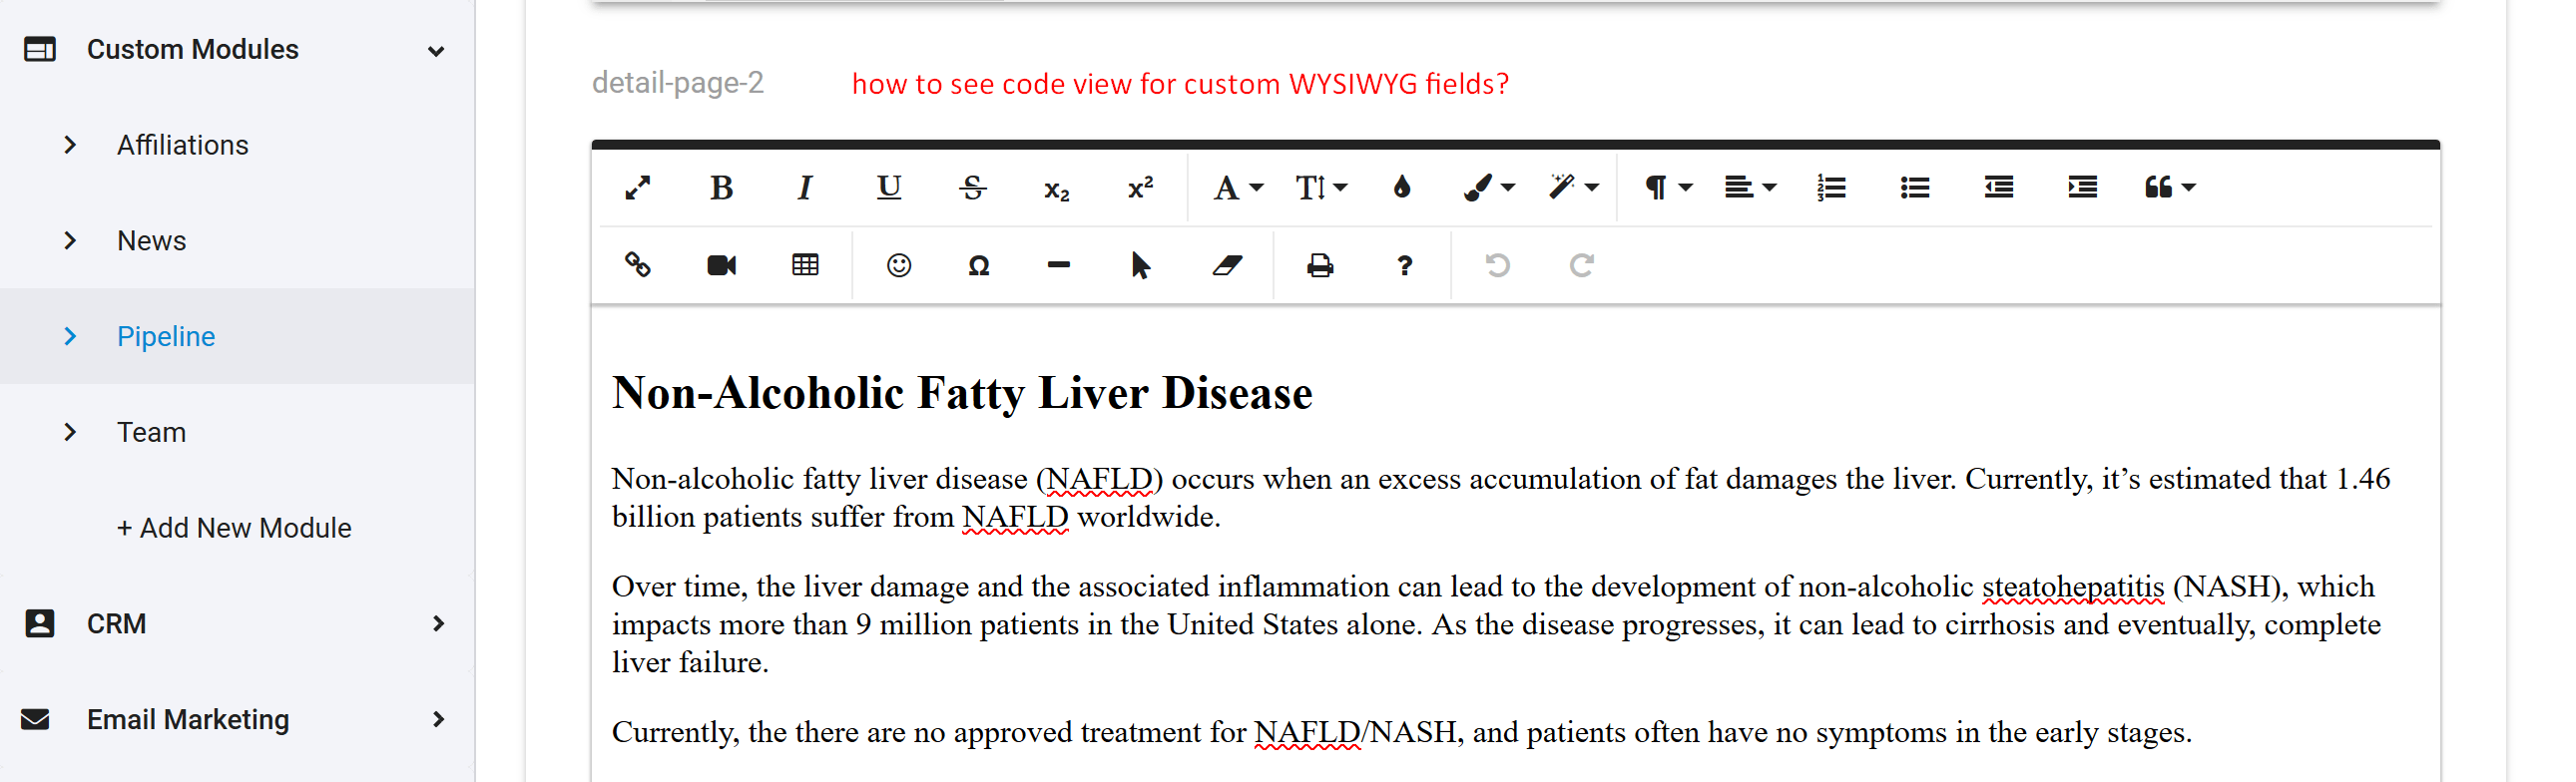
- Custom Modules
- UI/UX
- WYSIWYG Editor
Menu Layouts Inline With Other Modules
-
For consistency, I’d like to see Menu layouts brought into the admin more in line with how all other module layouts are managed.
Some mockups below: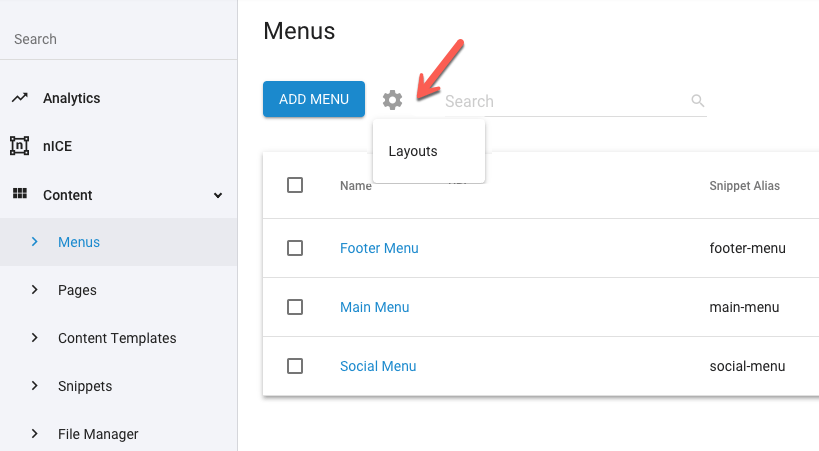
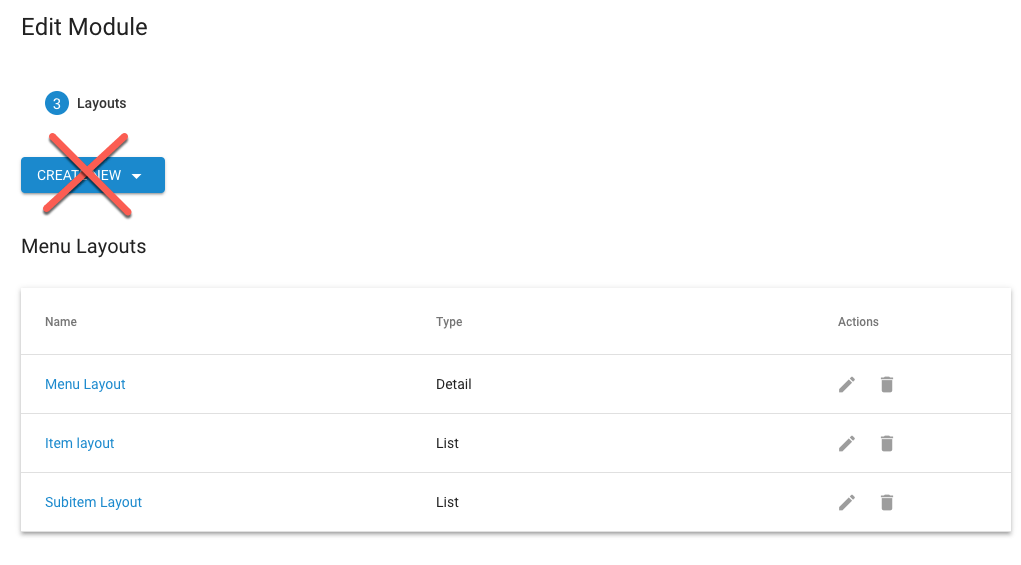
- Admin Panel
- Menus
Update Import Templates To Allow "Disable From Site Search" For Items During Import
-
Items imported into Treepl using Templates do not always need to be found by Site Search.
By default, all imported Items are found by Site Search.
In Use Cases where Items should not be searchable it is necessary to edit every Item after it is imported and check the Disable From Site Search check box.
A number of partners have encountered this issue,...
- WebinOne Portal
BUG: Site Search With Multiple Keywords
-
Site search using more than one word as the search term is not returning any results, even with site reindexed.
Tested on both a live site and a trial site.
- Bugs
- General
BUG: “site.webmanifest” Files Not Supported
-
“site.webmanifest” files are not accessible via their URLs and are therefore not usable by browsers and other applications.
- Bugs
- General
Link Manager Changes Link Name
-
When using the Link Manager in the WYSIWYG editor for linking to a page, the Link Manager will overwrite the text selected as link with the name of the page.
Example:
"This is my LINK"
Then mark "LINK" and go to the Link Manager and press "Page" and then choose a page called "Test".
When...
- Bugs
- General
- WYSIWYG Editor
Auto-Collapse Item Settings / Custom Properties Toggle
-
The ability to have a “cookie” set to remember when you click the toggle to collapse container?
This way when you go back it is still set as collapsed? Or somewhere in a General Settings area where you can have it set to Auto Collapse (like a Global Setting).
Also the ability to apply this to the ‘Items Per Page’ pop-up...
- Admin Panel
Events Not Sorting By ‘EventDateStart’ And ‘EventDateEnd’
-
When using sortBy parameters in the component module for events, ‘EventDateStart’ and ‘EventDateEnd’ do not work to sort by those dates.
- Bugs
- Events
Saving Template Will “Postpends” A "-1"
-
When saving Templates after within Content Template, it “postpends” a -1 after it.
Even after -1 is removed it brings it back again.
If saving it again, adds a 2, saving it a third time adds a 3 etc.
Screen shot is after removing, saving, back to list view, saving, and it comes back again.
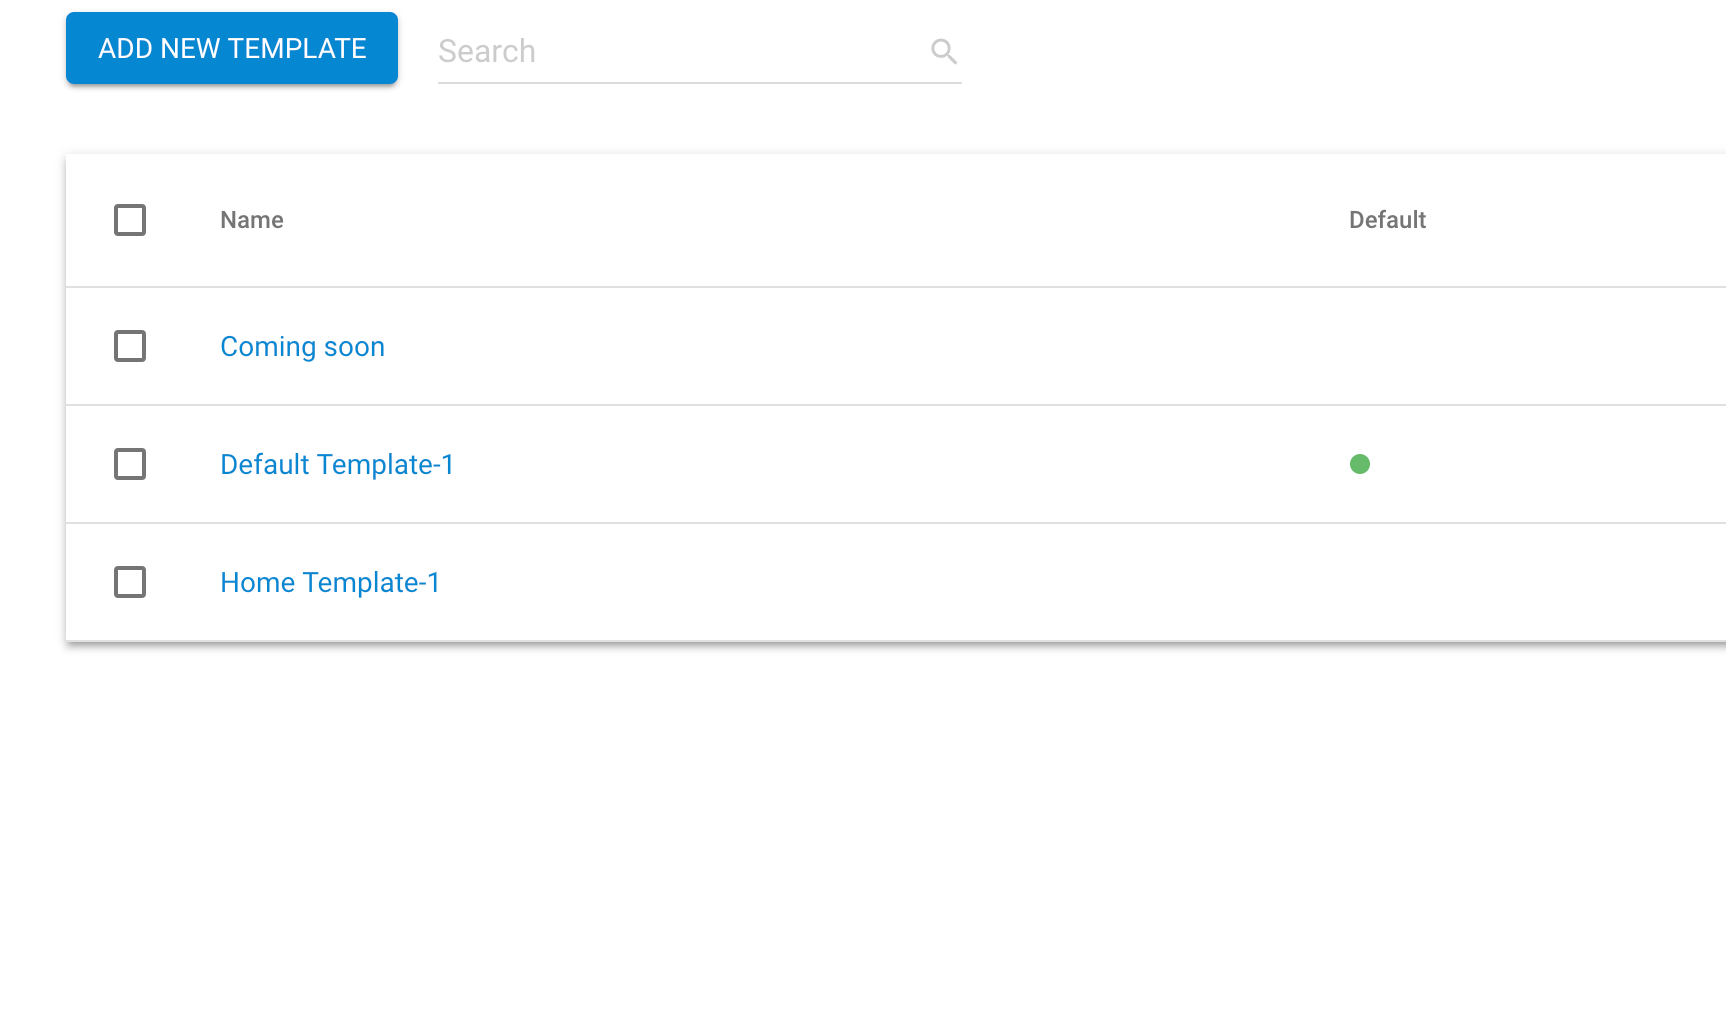
- Bugs
- Pages and Templates
Full Release Notes
|
Backlog |
UPDATE |
Now Liquid can convert numbers to date (interpreted as number of seconds from 1st Jan 1970). For example: |
|
Backlog |
WYSIWYG - Image padding UI |
Provide ability to add/edit spacing around images |
|
Backlog |
Managing Content templates through FTP |
Add ability to manage Content Template via FTP. Folder to check files in: /Content/ContentTemplates File to check schema: .html If Content template created in admin contains unaccessible symbols for file name - replace them with empty string ("") for file name (name of the template remains the same). Extend Content template with the same FTP Path variable as Pages has. Managing functions are the same as for pages:
|
|
Backlog |
Managing Snippets through FTP |
Add ability to manage Snippets via FTP. Folder to check files in: /Content/Snippets File to check schema: .html If Snippet created in admin contains unaccessible symbols for file name - replace them with empty string ("") for file name (name of the Snippet remains the same). Extend Snippets with the same FTP Path variable as Pages has. Managing functions are the same as for pages:
|
|
Backlog |
Managing Email templates through FTP |
Add ability to manage Email Template via FTP. Folder to check files in: /Content/EmailTemplates File to check schema: .html If Email template created in admin contains unaccessible symbols for file name - replace them with empty string ("") for file name (name of the template remains the same). Extend Email template with the same FTP Path variable as Pages has. Managing functions are the same as for pages:
|
|
Backlog |
Managing Module Layouts through FTP |
Add ability to manage Module Layouts via FTP. Folder to check files in: /Content/ModuleLayouts/ File to check schema: .html If Module Layout created in admin contains unaccessible symbols for file name - replace them with empty string ("") for file name (name of the Module Layout remains the same). Extend Module Layouts with the same FTP Path variable as Pages has. Managing functions are the same as for pages:
|
|
Backlog |
Managing Forms through FTP |
Add ability to manage Forms via FTP. Folder to check files in: /Content/Forms File to check schema:
|
|
Backlog |
Managing System Pages through FTP |
Add ability to manage System Pages via FTP. Folder to check files in: /Content/SystemPages File to check schema: .html If System Pages created in admin contains unaccessible symbols for file name - replace them with empty string ("") for file name (name of the System Page remains the same). Extend System Pages with the same FTP Path variable as Pages has. Managing functions are the same as for pages:
|
|
Backlog |
Managing System Emails through FTP |
Add ability to manage System Emails via FTP. Folder to check files in: /Content/SystemEmails File to check schema: .html If System Email created in admin contains unaccessible symbols for file name - replace them with empty string ("") for file name (name of the System Email remains the same). Extend System Emails with the same FTP Path variable as Pages has. Managing functions are the same as for pages:
|
|
Backlog |
Managing Workflow Emails through FTP |
Add ability to manage Workflow Emails via FTP. Folder to check files in: /Content/WorkflowEmails File to check schema: .html If Workflow Email created in admin contains unaccessible symbols for file name - replace them with empty string ("") for file name (name of the Workflow Email remains the same). Extend Workflow Emails with the same FTP Path variable as Pages has. Managing functions are the same as for pages:
|
|
Backlog |
Beta Feature flags |
Ability to enable/disable some beta features before they become default. |
|
Backlog |
Default auth cookie life time to 24h |
Extend cookie life time after log in to secure zone from 30 min to 24hrs |
|
Backlog |
Admin URL management improvement |
|
|
Backlog |
Liquid engine refactoring (ALPHA) |
Refined and optimized Liquid Parsing process.
Feature is incompatible with nICE for now (compatibility is under development). |
|
Bug |
Allow ‘Amount’ payment when Event Price is 0 |
When
Than - proceed payment the same way as it does for event by event.price BUT use FormSubmissionData.Amount as Price |
WYSIWYG Editor - Image Manager
-
Need to have the ability to add Spacing and Image Compression options as well, similar to how Shopify handles this
Right now one need to manually go in and update Margins. Would also be good to assign a custom CSS class to images.
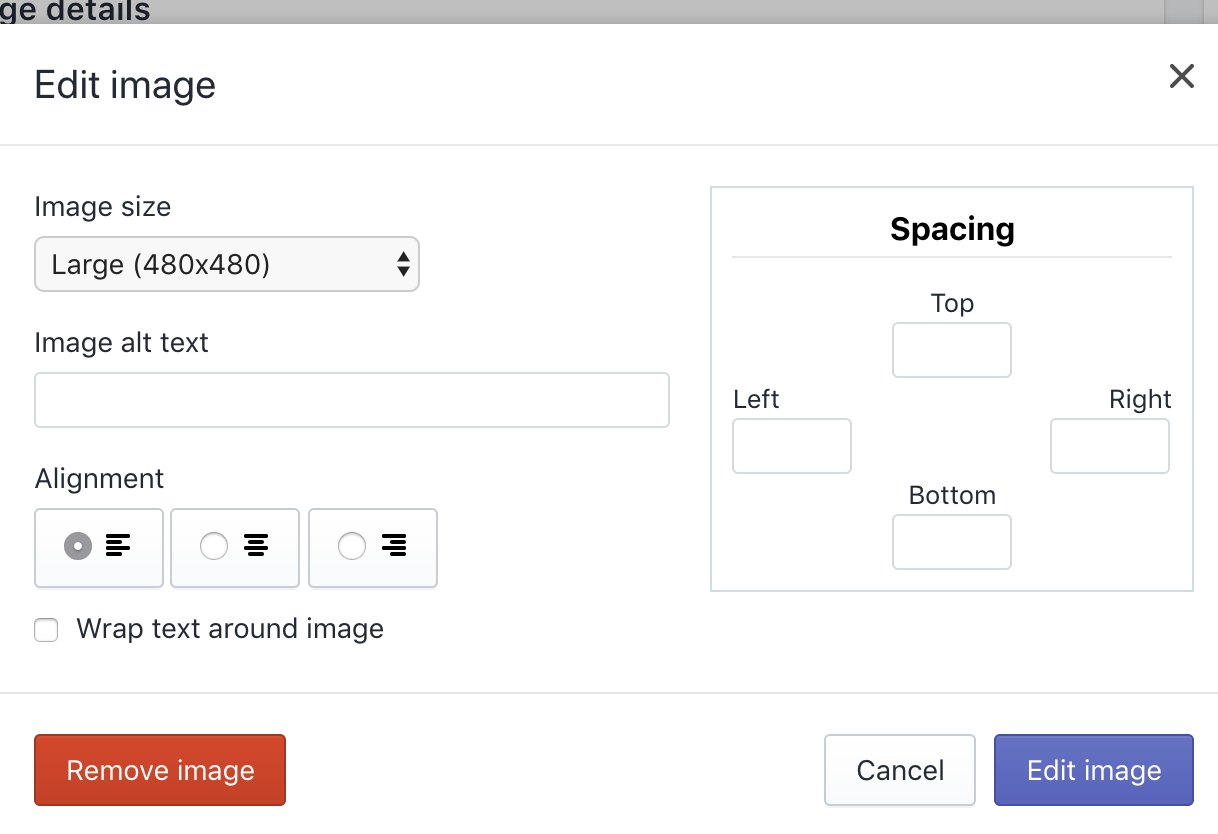
- Admin Panel
- WYSIWYG Editor
FTP Access to Templates Etc.
- FTP access to Pages, Menus, Content Templates, Snippets, Web forms (!), Blogs + Blog Posts, Events and Event Groups, Banners (Ad rotators), Galleries/Sliders (Photo Galleries), Authors, FAQ's, Custom Modules, Workflow Emails, System Emails, Email Templates and System Pages
- FTP
Full Release Notes
|
Backlog |
Documentation link in the admin |
Documentation link in the admin should be viewed only for partners: |
|
Backlog |
'Do not use template' and 'use default' template behavior |
Modify content template and email template wrapping behavior:
In Admin added 2 options when assigning Content Template and Email Templates:
|
|
Backlog |
Event - Calendar Support |
Design: http://prntscr.com/mu68eb Responsive calendar support for Events:
Created new include file "/cms-assets/includes/event-calendar.inc". Add component toolbox option
|
|
Backlog |
Add "Parentname" To module Component |
{% component source: "Page", layout: ""...
|
|
Backlog |
Home Page Status Available In {{this}} Object |
Include the ‘Set as Home Page’ data within the {{this}} object so we have it available in Liquid. It can be helpful to know for setting certain conditions in the template; just some examples:
{{this}}:
{
"isHome" : true, ...
|
|
Backlog |
Direct Link To CRM Form Submission Entry |
|
|
Backlog |
Internal Custom Module Search |
The ability to search all items in Module List even with “Disable from Site Search” checked. “Disable from Site Search" should only be for the front end site only, and not internally. Looks like you lose search functionality within the custom module list when it is checked. https://treepl.co/images/public-roadmap/Internal-Custom-Module-Search.png |
|
Backlog |
File Exports: Prepend Site URL And Postpend Date |
When exporting files add the site url to the beginning of the file name and the date to the end of the filename i.e. 'website.com-team-module-export-2018-12-30.xls' |
|
Backlog |
Remove Event specific fields from Event Group module |
These fields should not be present and are used for Event items, not their groups: |
|
Backlog |
Global setting for enable/disable text wrapping on a new line |
Add a global setting that will enable/disable text wrapping on a new line in the ace editor. 'Settings' > 'Misc' |
|
Backlog |
Keyboard shortcut to save content in ACE and WYSIWYG editors |
Apply CTRL+S/Command+S Shortcut Keys to save content when in ACE and WYSIWYG editors |
|
Backlog |
Reindex site - checkstatus and disallow reindex when indexing in progress |
Apply loader and disabling of reindex site button in order to prevent multiple reindex process trigering. Button should be disabled even after page reloading. Once reindex is finished - remove the loader and activate reindex button. Design - http://prntscr.com/mu66s9 |
|
Backlog |
Show treepl cms version in the admin |
Design - http://prntscr.com/mu679j |
|
Backlog |
Rename Documents to File Manager in WYSIWYG link manager |
Rename "Documents" title to "File Manager" in WYSIWYG link manager http://prntscr.com/mnbls0 |
|
Backlog |
Show Template and release date on module item list view |
Add columns to module item list view in Admin:
Provide ability to sort by Release Date |
|
Bug |
Empty google analytics view ID showing and missing |
Fix bugs with head auto added items:
|
|
Bug |
OpenGraph Properties in Liquid not accessible |
`{{this.opengraphproperties}}` renders the sub-properties as JSON ok, but couldn't access those sub-properties directly, ie: `{{this.opengraphproperties.title}}`. |
Add TreeplCMS Version Number In Admin
-
Add version number in the admin
{% endunless -%} ...
{% unless request.request_url.href contains "?tag" -%}
- Admin Panel
Use Blank Template
-
Sometimes when you want to create a new page on a site you don't want to use a template - perhaps for a differently style landing page or some other random page. Currently the system pulls in the default template. Can we have a page option that allows 'Don't use a template'.
- Templates
Add "Parentname" To Component Source: “Page”
-
Add "parentname" to component source: page to target the name of the template.
{ % component source: "Page", layout: "".........
{
"id": 1832,
"url": "",
"parentid": 1833,
"parentname":
"lastupdateddate": "2018-10-21T23:34:21","
- Pages and Templates
Direct Link To CRM Form Submission Entry
-
Ability to grab direct link to CRM form submission entry from the either the formsubmission or workflow collections to place in workflow email.
This is so that one can direct a workflow recipient straight to the Form submission in the admin console. something like {{ this.formSubmissionData.crm_link }} ...
- CRM
- Liquid
File Exports: Prepend Site URL And Postpend Date
- When exporting files add the site url to the beginning of the file name and the date to the end of the filename i.e. website.com-team-module-export-2018-12-30.xls
- Admin Panel
- General
Home Page Status Available In {{this}} Object
-
Include the ‘Set as Home Page’ data within the {{this}} object so we have it available in Liquid.
It can be helpful to know for setting certain conditions in the template; just some examples:
· Show a hero slider above content when on home page
· Do not show a global subscription pop-up/modal window when on home page...
- Liquid
Internal Custom Module Search
-
The ability to search all items in Module List even with “Disable from Site Search” checked. “Disable from Site Search" should only be for the front end site only, and not internally. Looks like you lose search functionality within the custom module list when it is checked.
- Custom Modules
Full Release Notes
|
Backlog |
Custom module items: Inheriting default settings on import/create from frontend |
Use custom module settings on events below. -> Settings -> 'Secure Zones'
-> Item Properties -> 'Default Properties'
Therefore, new imported items will inherit Custom Module setting. So if you have "Disable from Site Search" checked - all new imported items will have "Disable from Site Search" checked (already existing items will not be affected). System flow:
|
|
Backlog |
Datetime oriented by site Timezone |
On site creation process, save selected timezone to the site. On the site use saved timezone for all date based variables. |
|
Backlog |
SiteSearch index rebuild function |
Added Rebuild Index button to the header of the admin http://prntscr.com/mlioin Clicking on it will trigger background process that will rebuild search index that is used by site search and custom module search |
|
Backlog |
Global 'Show this page for search engines' button |
SEO: Added two buttons under 'Pages search engines settings:'
Both do one time action - either enables or disables "Show this page for search engines" option in every system and custom module item. On click show confirmation message:
|
|
Backlog |
Added SUBSCRIPTIONS tab to event item |
|
|
Backlog |
Events in secure zones |
Add ability to select event items from secure zone items combobox |
|
Backlog |
Add Event links to Menu link widget |
Add ability to select event groups/items for menu items http://prntscr.com/mgihun |
|
Backlog |
restore_password/activate_account token lifetime change |
Increase restore_password/activate_account token lifetime from 30 min to 24h (allowed secure zone users not respond longer on restore password emails. Especially make sense if restore password was triggered manually by the admin) |
|
Backlog |
File creation during copy page bugfix |
Fixed issue caused during copying of a page: page file was not created. |
|
Backlog |
Add search form to Component Manager + search by trpEvents fields |
Add Events -> Search Form item to the Component Manager http://prntscr.com/mgimch Provide same iterface as for the Custom Module search form (except for selecting module since Event is the only module available for the section) Generated search form should contain Event specific fields and be able to search by them:
|
|
Backlog |
Implement Emmet In The ACE Editor |
Emmet is a system that allows coders to write shorthand and have it expanded when you push the tab key. It can save a lot of typing when writing web pages. Eg. you type 'p' and then press 'tab' and you get: , or you type 'div.wrapper' and 'tab' you get: You can even do more advanced things like creating multiple instances with nested objects. Here is an code playground of Emmet implemented in Ace (Go ahead and type p +tab on an empty line or ul>(li.item>a)*5 plus tab. ) https://ace.c9.io/demo/emmet.html Here is the documentation for Emmet https://docs.emmet.io/abbreviations/syntax/ |
|
Backlog |
Collapse, And/Or Pre-collapse Content Boxes |
Ability to collapse/expand content boxes in pages / templates / modules, etc. https://prnt.sc/mgi9l7 |
|
Backlog |
Rename "seoTitle" To "metaTitle" |
Module Item -> SEO tab: Rename "seoTitle" to "metaTitle" for consistency and accuracy. |
|
Backlog |
WYSIWYG - Image and links titles |
Add ability to set/edit titles for links and alt text for Images inside the WYSIWYG |
|
Backlog |
Extend meta description symbols limitation |
Extend meta description symbols limitation to 1000 |
|
Backlog |
Inactive state for module items (by dates) |
Display inactive state on items list and tree view: Item is inactive when currentDate < Release date or currentDate > Expiry date |
|
Backlog |
WYSIWYG - URL browser for links |
Add ability to choose URL for links from:
Similar to BC widget: |
|
Backlog |
Improve load speed of the pages |
Pages that uses many liquid components now loads faster. |
|
Backlog |
Rollback overriden params in modules |
When rendering module inside layout of the another module - params variable should not be overriden by the nested module. Example On any page: Inside "List" layout of the "Example" module:
Inside "List" layout of the "Example 2" module: any string
Expected:
Actual
|
|
Bug |
ACE editor cut of JS content |
Steps:
Expected:
Actual:
|
|
Bug |
Allow create sites under trialsite.co |
Sites under trialsite.co now creating properly(previously was created under treepl.co domain) |
|
Bug |
Empty Google Analytics view ID showing |
Google Analytics code will not be viewed if no tracking id is set in the analytics tab. |
|
Bug |
Liquid: Roll back number filter |
" | number" filter is restored(previously was accidently removed from filters). |
|
Bug |
Allow event start date to be set to past |
When saving Event: Expected:
Actual
|
BONUS: Advanced Link Manager inside WYSIWYG Editor
-
In the WYSIWIG editor on pages or any other location where a url / link is may be added (blog, page edits, custom modules ) -
- "browse to url"
- link option to open in a popup
- add "title" tag to url links
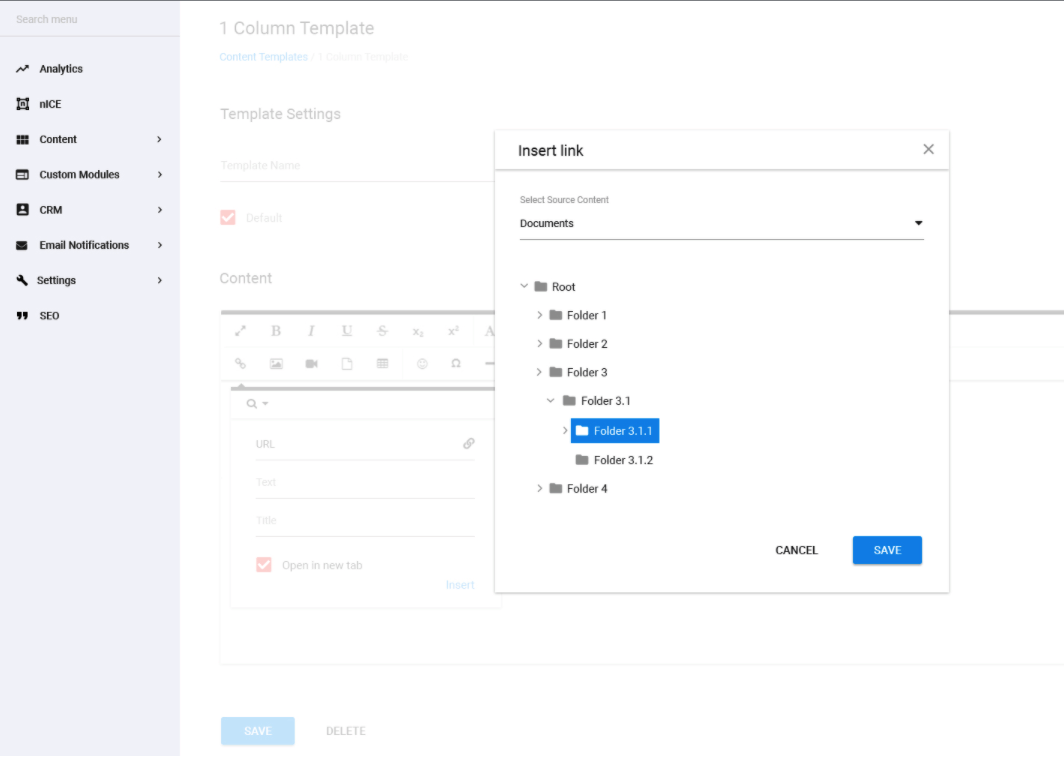 ">
">
- General
- WYSIWYG Editor
Match Date Format To Site's Time Zone
- Display dates in the correct format depending on time zone selected in site settings in partner portal.
- Admin Panel
BONUS: Enable/Disable All Pages/Module Items for Search Engines
-
Ability to show or hide all pages/modules of the site for search engines (sitemap.xml needs be regenerated after disabling/enabling this feature).
- SEO
Collapse, And/Or Pre-collapse Content Boxes
-
Ability to collapse, and/or pre-collapse content boxes in pages / templates / modules, etc.
- UI/UX
Implement Emmet In The ACE Editor
-
Emmet is a system that allows coder to write shorthand and have it expanded when you push the tab key. It can save a lot of typing when writing web pages. Eg. you type p the tab and you get
<p></p> , or you type div.wrapper and tab you get<div class="wrapper"></div> You can even do more advanced things like creating...
- Admin Panel
Rename "seoTitle" To "metaTitle"
- Rename "seoTitle" to "metaTitle" for consistency and accuracy.
- Blogs
- Custom Modules
- Pages and Templates
- UI/UX
Full Release Notes
|
Bug |
Double forward slash in URL when adding an item |
Fixed double forward slash appending to the preview URL when creating new page/module item: http://prntscr.com/lue4cl |
|
Bug |
{{FormSubmissionData}} in autoresponders when creating a new item is not consistent |
Submission data in autoresponders when creating new item now works correctly:
|
|
Bug |
Custom Modules Search by categories, tags and checklists doesn't work properly. |
Search by multiple categories, tags or checklist property values now works correctly and no longer results in a Liquid Error: Invalid cast from 'System.String' to 'System.String[]' |
|
Bug |
Opening custom module items in new tab goes to admin dashboard. |
Opening custom module items in new tab now works as expected rather than redirecting to the admin dashboard. |
|
Bug |
Canonical link empty causing liquid error. |
Fixed page crash if canonicalLink is empty (http://prntscr.com/lqz9vv) causing Liquid Error: This operation is not supported for a relative URI. Now no <link rel="canonical"> tag displayed on the page if value of the canonicalLink property is empty or not a valid URL. |
|
Bug |
Can't add www. to domain in 'SEO' -> 'Primary Domain' |
This field for setting the primary site domain now allows any subdomain to be entered, including www. |
|
Bug |
Disabled page renders blank document. |
When attempting to load a disabled page a completely blank document was rendered. Now system renders a 404 page. |
|
Bug |
Date comparison via module components not working. |
Date fields can now be filtered in {% component type: "module" ... %} via 'filterBy' and 'filterValue' attributes, including:
If 'filterBy' is set to a date type field:
|
|
Bug |
Nice editor - $[number] text bug |
Texts that contain $ sign and a number next to it (eg: $2) no longer brakes text after saving. |
|
Bug |
Item without a detail layout shows completely blank document. |
404 page is now displayed when an item’s detail layout has type “List” (or no layouts with type "Detail" are present or the default "Detail" layout has been saved as a "List" type). |
|
Bug |
Bug with rendering SEO Title. |
SEO/meta title now renders by the system under the following conditions:
|
|
Bug |
Item URL preview not updating correctly. |
Item’s preview URL (shown under item’s URL field) is now displaying correctly when creating a new item and when editing existing and updating it's parent folder (resulting in URL change). |
|
Backlog |
Alternative Domain For Trial Sites |
Added ability to choose an alternative domain for new trial sites (trialsite.co) rather than the current "treepl.co" domain. |
|
Backlog |
Mailchimp API integration. |
Added new section: 'Email marketing' > 'API provider'. This allows you to setup Mailchimp API credentials (API key) that are required for integrated email marketing functions. API key can be retrieved on this page from the mailchimp account https://us19.admin.mailchimp.com/account/api/ (us19 in the url is datacenter that can be different for your account, so may need to replace this with your account’s datacenter) |
|
Backlog |
Mailchimp API integration: Mailing Lists |
Added new section 'Email Marketing' > 'Mailing Lists'. Section provides the ability to perform Create, Read, Update and Delete actions (CRUD operations). When a Mailing List is added, updated or deleted – it will be automatically added, updated or deleted in the linked mailchimp account (using API credentials in 'Email Marketing' > 'API Provider'). Currently one way push from Treepl CMS to Mailchimp (two way sync will come later). |
|
Backlog |
Mailing Lists subscriptions in Forms. |
In 'Content' > 'Forms':
|
|
Backlog |
Mailchimp API integration: Subscribe/Unsubscribe user event. |
If a user subscribes or unsubscribes from a mailing list via Mailchimp, the event is pushed to Treep CMS to unsubscribe the CRM contact from the appropriate mailing list.
|
|
Backlog |
Mailchimp API integration: CRM Contact mailing lists management. |
Added ability to view subscriptions via the CRM contact record, as well as subscribe and unsubscribe them to/from mailing lists. Also added same ability in the 'Mailing List' > 'Subscribers' section. |
|
Backlog |
More settings on Google Analytics dashboard. |
Added more data from Google Analytics available through the API:
|
|
Backlog |
Refine reCaptcha For Mobiles |
Default form layout generator now generates reCaptcha’s code in compact mode for mobile using liquid conditional statement (utilising the 'data-size="compact"' attribute). |
|
Backlog |
Default Datepicker. |
Date fields will be generated by the system using default datepicker (on content forms when form layout is generating by the system and when generating create/update module item forms). |
|
Backlog |
Settings area available for System Modules. |
System Modules now have settings and properties available to access (found under the gear icon), which include:
Available on Pro+ plans only. |
|
Backlog |
Show correct IP Address for Data Center. |
When activating a site in the Partner Portal, the relevant data center's IP address is displayed for use in your DNS. |
|
Backlog |
Change "Email Notification" To "Auto-response". |
"Email Notification" title, in the forms settings page, is now more correctly changed to "Auto-response". |
|
Backlog |
Global site preview button. |
Added "Home" button to admin header bar (next to the partner logo) that opens the home page in a new tab. |
|
Backlog |
{{request.device_type}} property. |
Added 'device_type' property to request object {{request.device_type}}. Returns device type:
|
|
Backlog |
SEO OG image tag improvement. |
System will automatically prepend "https://[current Domain]" to the path of the selected image when setting the OG tag properties under the SEO tab for various items. |
|
Backlog |
nICE - "Webpage Spell Check" compatibility. |
Provided compatibility with Webpage Spell-Check (https://chrome.google.com/webstore/detail/webpage-spell-check/mgdhaoimpabdhmacaclbbjddhngchjik). |
|
Backlog |
Add 'Author' field in Import/Export. |
Author system property field now added to Import/Export process for Custom Module items. |
|
Backlog |
Home page indicator in list view. |
Added a home icon, in the item list view, that helps to more easily see which page/module item is set as the home page. |
|
Backlog |
Extend meta description max value. |
Meta description, under the SEO tab, maximum character value extended to 400 characters. |
|
Backlog |
{% component type:"module" ... %} - pagination improvement. |
Pagination for Custom Module items was slightly reworked:
|
|
Backlog |
Redirect to 'Unauthorized' system page if login failed. |
On login process if the user failed to login, the system will redirect them to the 'Unauthorized' system page instead of redirecting to the home page with "/?login=failure" appended to the URL. |
Global Preview Button
-
Add "Preview" button to admin header that will lead to the home page in a new tab.
It'll be somewhere here:
- Admin Panel
Mailchimp API Integration Stage 1
-
Connect your Mailchimp account to Treepl CMS (same way you setup Google Analytics feed integration). Create mailing lists in Mailchimp through API from Treepl CMS submitted forms:
- Ability to create, update and delete mailing lists via mailchimp API
- Ability to setup mailchimp api integration
- Ability to add subscription functionality to the form
- Marketing
Change "Email Notification" To "Auto-response"
-
Change "Email Notification" to "Auto-response" on the "Settings" tab under "Forms"
- Emails
Default Datepicker
- Use browser's default datepicker for datetime fields on content forms and create/update module item forms.
- UI/UX
Module Settings On System Modules
-
Allow using module settings on system modules:
- Blogs
- Blog posts
- Banners
- FAQ's
- Galleries
- Authors
(all except of Pages).
Available on Pro+ plans only.
*This feature would cover the following request: "Enable multiple detail layouts for blogs and blog posts."
- Blogs
More Settings On Google Analytics Page
- Add more data from Google Analytics available through API.
- Analytics
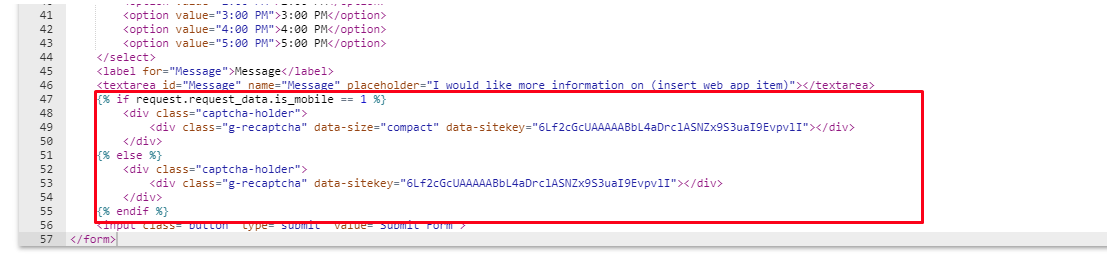
BONUS: Duplicate Button
- Ability to duplicate any existing 'Page', 'Content Template', 'Custom Module item', 'menu' etc.
- General
Add, Edit And Delete Custom Modules Items (Frontend)
-
Ability to Add, Edit And Delete Custom Module Items for logged in users.
Ability to setup Add, Edit Or Delete module item permissions for particular Custom Module
Ability to setup autoresponder when new module item created by logged in user.
- Custom Modules
- Member Area
Automation Of Sitemap.xml
-
Add an automatic sitemap.xml listed for each site and refreshed every 24 hours. If we can make selections about importance of each page ie. priority and change frequency that would be ideal with the last modified date automatically updated. The sitemap needs to be setup with all urls being the ‘default’ domain ie. either the www or non-www.
This should include...
- SEO
BONUS: FTPS
-
- Switching from FTP to FTPS
NOTE: Login process is the same as it has been. However, you may need to change Protocol or Encryption setting in your FTP client of choice when using saved/favorited connections.
- FTP
BONUS: Show “Enabled/Disabled” In “Pages”
-
Show if a page is enabled or disabled to better handle individual page visibility.
For example in the same way as in menus.
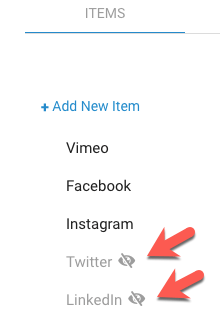
- General
- UI/UX
Pre-setup Default Workflow Notifications
-
All sites (with any plan) get a default workflow:
- Name: "Inquiry Workflow"
- "Inquiry Workflow" can not be deleted
- "Inquiry Workflow" can not be renamed
Workflow restrictions for "Essential" and "Business" plans:
- Disabled add/edit/delete options for all workflows other than "Inquiry Workflow"
- Disabled "Email Marketing" > "Emails" section
- Disabled workflow triggering on form submissions...
- Workflow
Add Basic Open Graph Fields
- Option to set Basic Open Graph http://ogp.me/ for every site page, detailed custom module pages, overall blog pages, blog posts (article og), products, media downloads (structured properties) if possible.
- SEO
Avoid Redirects
-
Remove the current forward setup on each homepage so that the domain name can be the homepage which is not recommended.
- https://developers.google.com/speed/docs/insights/AvoidRedirects
- SEO
BONUS: Robots.txt On Templates
- Include a robots.txt file on all website templates that allows for spidering of whole site.
- SEO
Link Manager
-
All link/file selection field types throughout the admin. Like a 'link manager' type widget, similar to in BC.
For example in 'menus', this will give the ability to select a link in the "link manager", instead of manually typing it in.
- General
- UI/UX
Site Activation Billing
- Integrate billing as a first step of activating the site from trial to live.
- WebinOne Portal
BONUS: Import/Export Of Items On Tree View
-
Ability to import/export items (parent or child) in a tree view.
All items are imported/exported to/from the level where you perform the action.
- Banners
- Blogs
- Custom Modules
- Galleries/Sliders
- Pages and Templates
Default Home Page Setup
-
Abbility to setup any page as a home page.
As a result the "/" URL will render that selected page.
- General
- SEO
Disable Content From Site Search
- Ability to disable certain content from site search functionality as it is currently bringing up results like list items, galleries etc. that don’t have a whole page dedicated to them.
- General
- SEO
File Manager In Templates And Snippets
- The ability to access file manager in templates and snippets like in a normal page.
- File Manager
- UI/UX
"text type" to "media type"
- In blogs and slides, make "text type" image source properties to become "media type" for easier image management.
- Blogs
- Galleries/Sliders
- UI/UX

Title Tag In Menu Items
-
‘Title’ tag for the menu items - For improved SEO.
Allow menu items to have a tooltip added and only show target, id and class fields if they aren’t empty like how BC renders menu bar items.
- Menus
- SEO
Secure Zones
-
Ability to:
- Create secure zones
- Assign content to secure zones
- Assign secure zones to registered users
- Member Area
AU + EU Data Centers
- Ability to create sites on AU (Sydney) and EU (Frankfurt) data centers. Planned for October 10th release.
- Infrastructure
Visual In-Context Editor (nICE) v1.0
-
Will be rolled out only to paid Treepl Partners.
WARNING: some Treepl Partners may get it earlier.
- General
- UI/UX
Sitemap in XML
-
- sitemap.xml is generated by request (separate button).
- Sitemap management (code editor).
- SEO
BONUS: Custom Workflows
- Ability to setup custom workflow notifications to Admin Users and/or manually added emails.
- CRM
- Forms
BONUS: System Pages
-
- "Settings" > "System Pages" - adding a separate section for customizing system pages.
-"404" and "Form Submission Results" pages will be moved to this section.
New system pages: "Forbidden" (secure zone access denied page), "Email Confirmation", "Request Reset Password", "Request Reset Password Result", "Reset Password", "Unauthorized".
- Admin Panel
- General
"| number" Filter For Liquid
-
New filter for formatting:
- Format:
{{variable | number: "[thousands separator]","[decimal point]","[decimals count]"}}
- Defaults:
{{variable | number: ",",".","2"}}
Example:
{{"3000" | number: ",",".","2"}}
Returns
3,000.00
...
- Liquid
BONUS: Edit Template From The Page
-
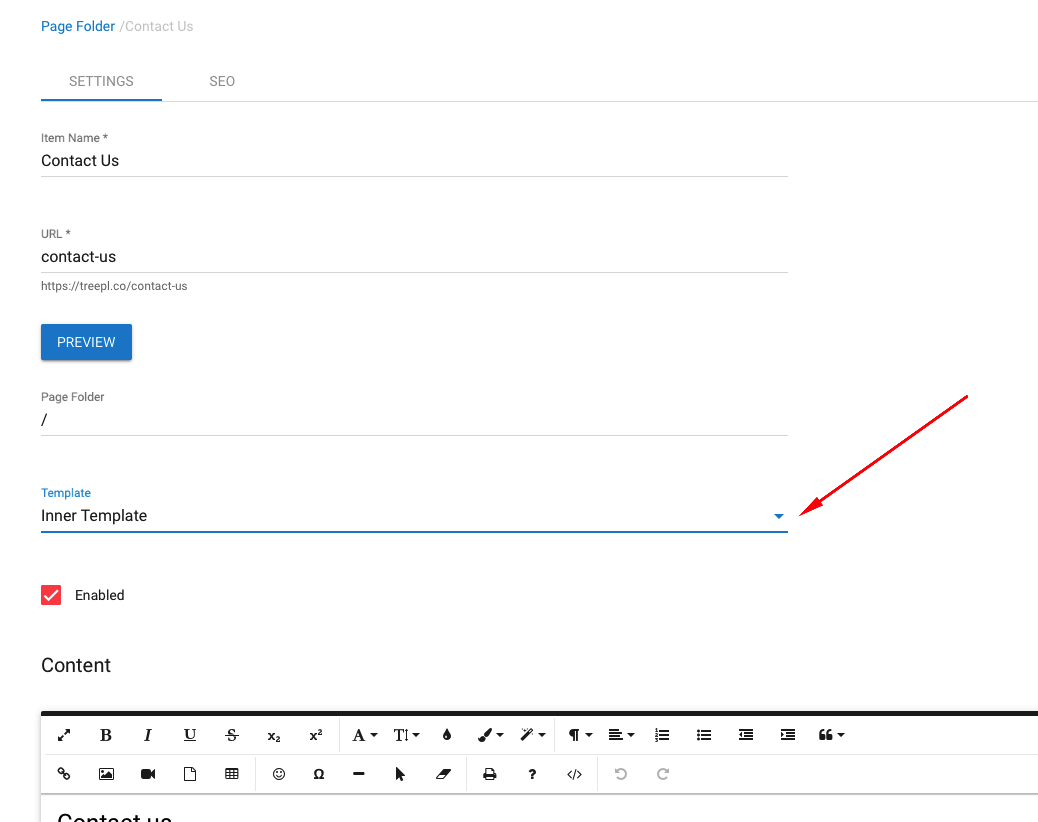 Allow navigation ("Edit" link) from the page to the template page directly.
- Pages and Templates
- UI/UX
BONUS: "Last Updated" Date Of Module Item
- "Last Updated" date tracking and accessibility through liquid tag: {{ this.LastUpdatedDate }}...
- Blogs
- Custom Modules
- Pages and Templates
BONUS: Menus Improvement
-
- Splitting Menu properties (Name, Alias) and Menu builder into 2 separate tabs to remove extra white space
- Remove "Save" and "Delete" from "Menu builder" tab
- Menus
BONUS: "Save and New" and Delete buttons
-
- "Save and New" button next to "Save" on Snippets and Custom Module items
- Move delete button to the right bottom of the editing page
- UI/UX
Branded Background Image Caching
- Make the branded background image for the login page to cache.
- UI/UX
- WebinOne Portal
Liquid Tag Insertion, Copying and Displaying
-
Module > Layouts > Properties (aka Toolbox)
Ability to:
- Copy liquid tag
- Insert liquid tag into last cursor position inside the layout
- See Liquid tag in a plain view next to the property name for easy reference
- Custom Modules
- Liquid
- UI/UX
Split Up Elements Into Sections
-
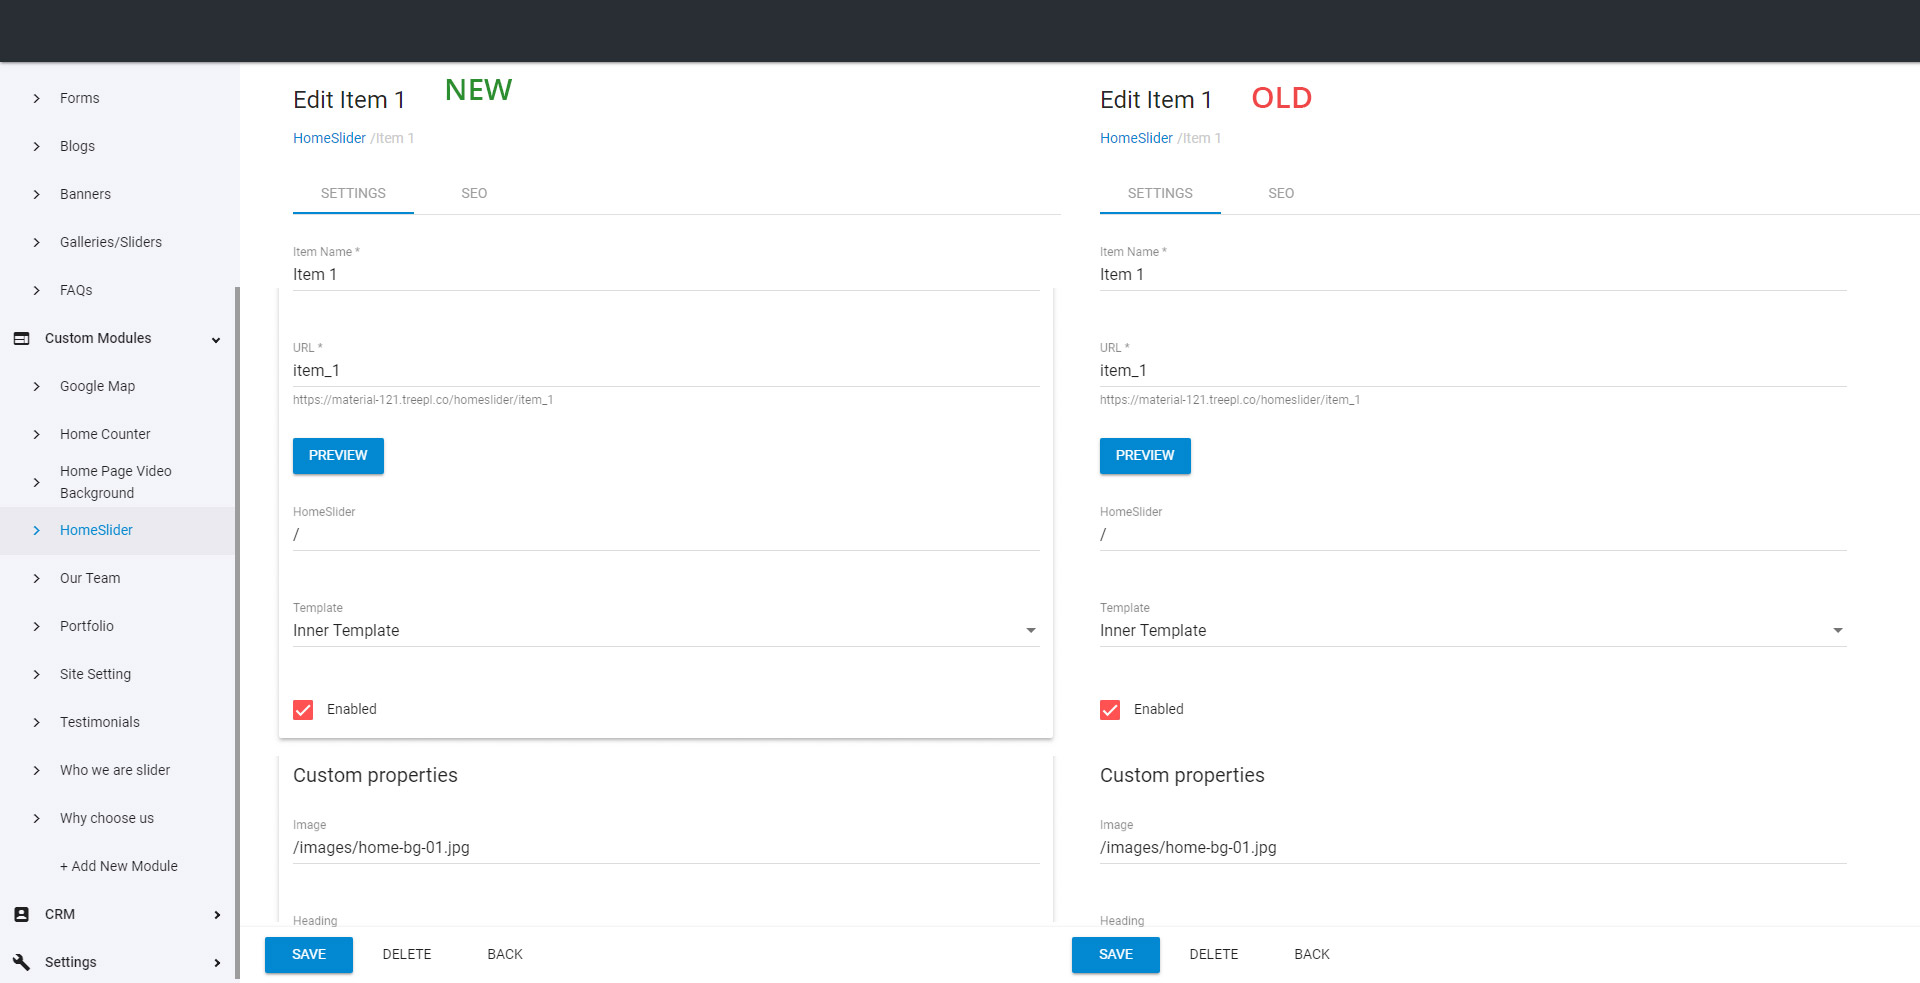 Split up elements of the system and Custom Module items into sections
- UI/UX